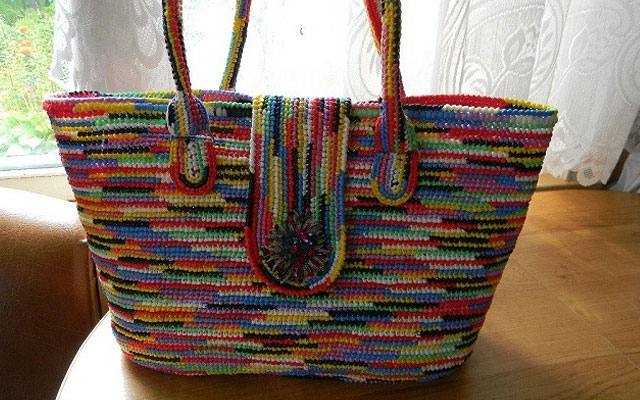
 Useful tips
Content:
How to sew a shopping bag with your own hands DIY
summer bag from T-shirts DIY
bag made of fabric (video) DIY clutch
bag
Updated leather bag with your own hands
How to decorate a bag with
your own hands DIY string bag DIY
beach bag
Small bag with your own hands with your hands from the book
DIY laptop bag
Women's fur bag (video) DIY
cooler bag (video)
Bags do it yourself (photo) DIY jeans
bag
Summer is in full swing and you really want to successfully update your wardrobe by adding original accessories that will attract attention and will be useful every day. DIY bags are what you need if you want your accessory to be not only beautiful, comfortable and functional, but also one of a kind!
Today we will learn how to make simple bags with our own hands at home. To work, you may need special tools, such as a sewing machine, old or new fabrics, small sewing accessories and, of course, imagination!
How to sew a shopping bag with your own hands
The simplest shopping bag, which will be an excellent alternative to disposable plastic bags, can be easily sewn from an old piece of material. To do this, you do not need to have the talents of a seamstress, but only be able to handle a sewing machine.
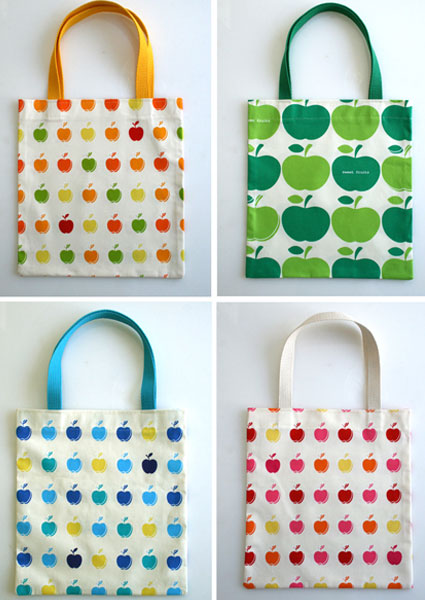
To work, you will need:
– 2 rectangular pieces of colored fabric of the desired size
– Ready-made thick fabric tape about 1 meter long and 2 centimeters wide
– Threads
– Sewing machine
– Scissors
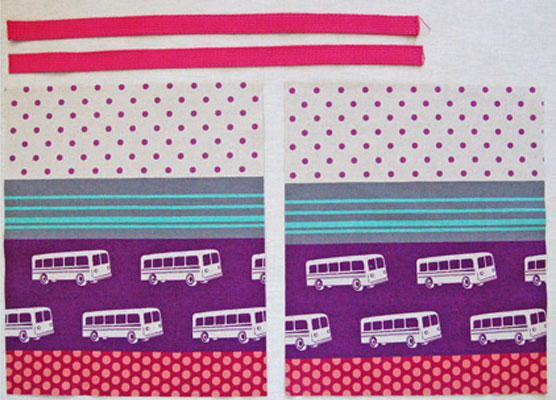
Let's get to work:
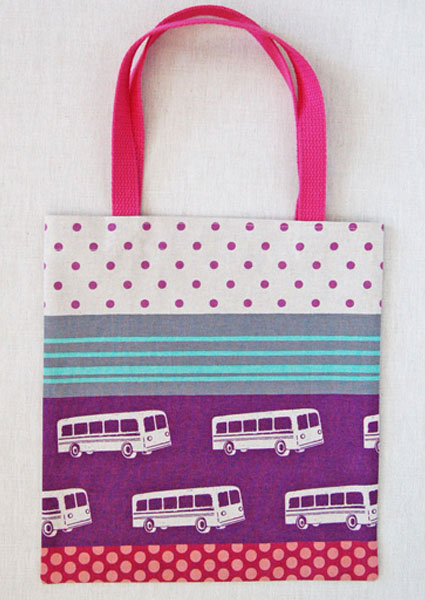
1) Using a zigzag seam, treat the upper edge of the fabric and sew the edge of the tape on the front side, as shown in the photo.
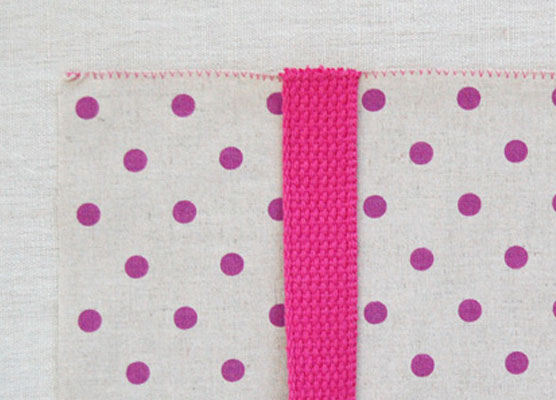
2) Then fold the edge inward by about 2 centimeters and stitch it in two lines, while grabbing the tape.
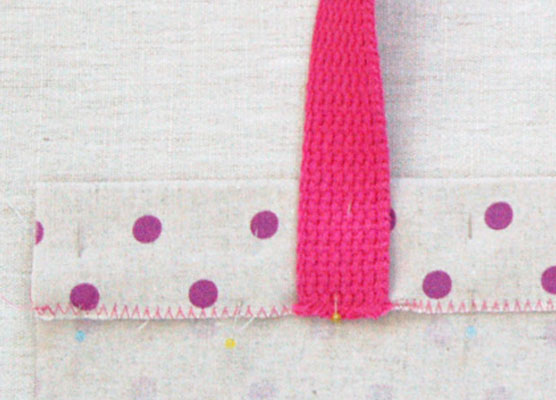
3) Remember to attach the second part of the tape to form a handle.
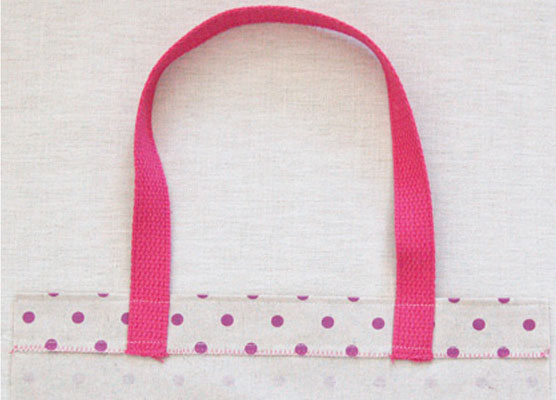
4) Do the same with the second piece of cloth. You got two halves of your future bag.
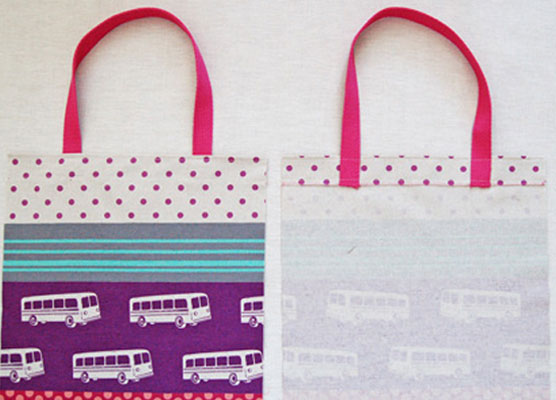
5) Fold both halves together with the front sides inward and stitch the edges with a zigzag or regular seam.
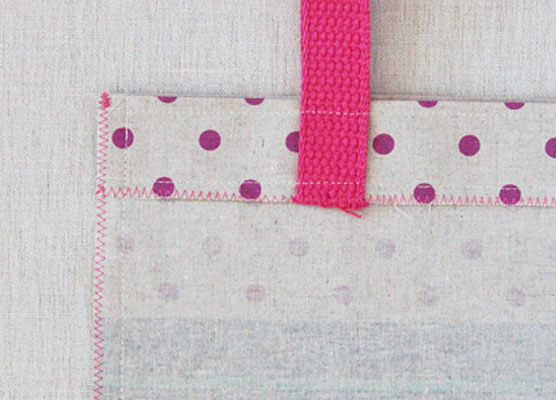
6) Turn the bag inside out.
DIY summer bag made of T-shirts
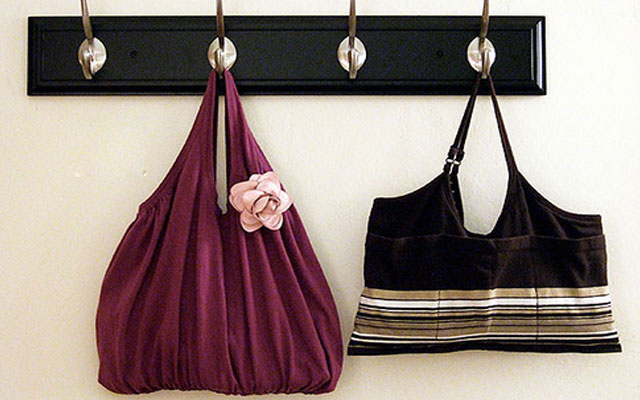
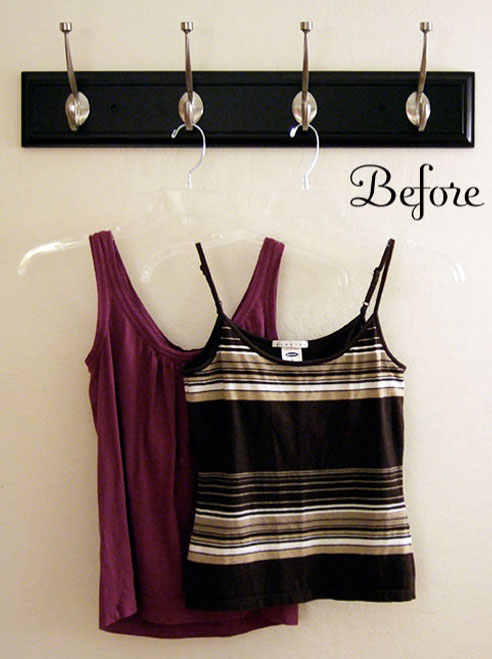
It's a great idea to use old unnecessary things for something useful. If you have old T-shirts lying around that you haven't worn for a long time, and you don't want to send them to rags, try turning them into lightweight summer bags.
To work, you will need:
– Old shirt
– Pins
– Threads
– Sewing machine
– Scissors
Let's get to work:
1) Cut off any unnecessary tags and labels from the shirt.
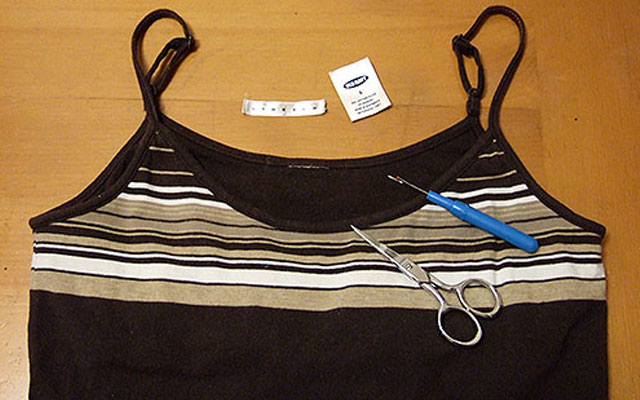
2) Turn it inside out and fold it across, as shown in the photo.
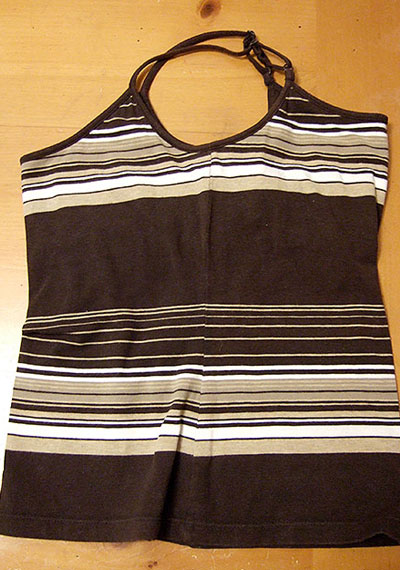
3) Fold the lower edges up and secure them with pins. These will be the inner pockets of the future bag.
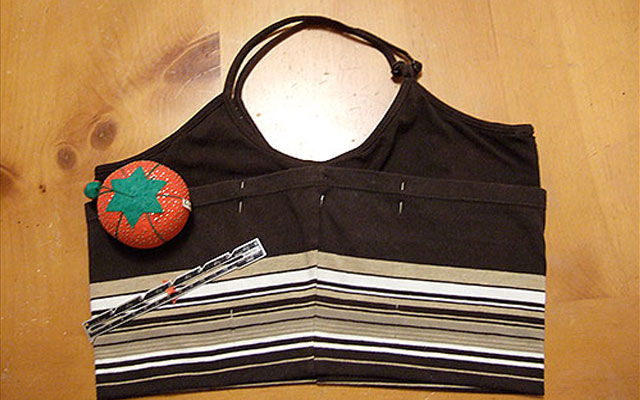
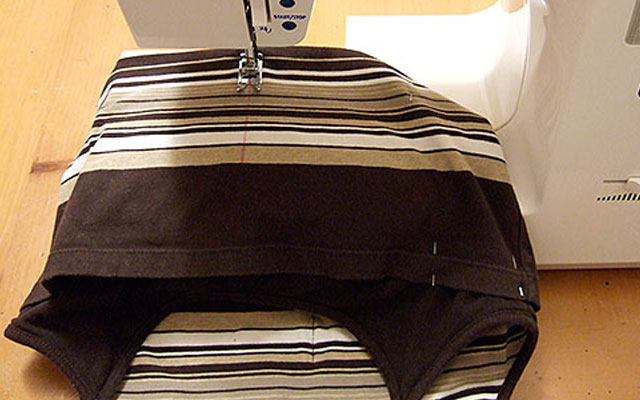
4) Sew the bottom edge on the machine, and also make a middle vertical seam on both sides so that each side has 2 pockets.
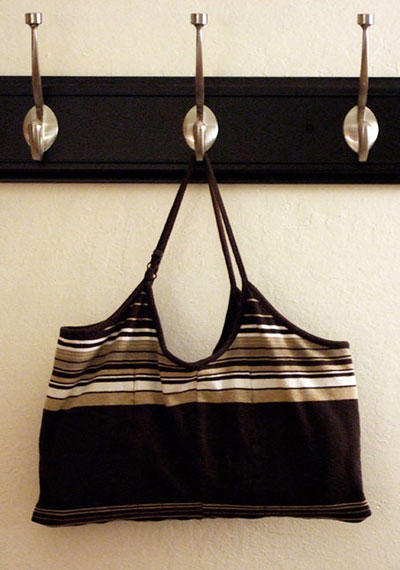
5) Turn the bag on the front side.
DIY fabric bag (video)
DIY clutch bag
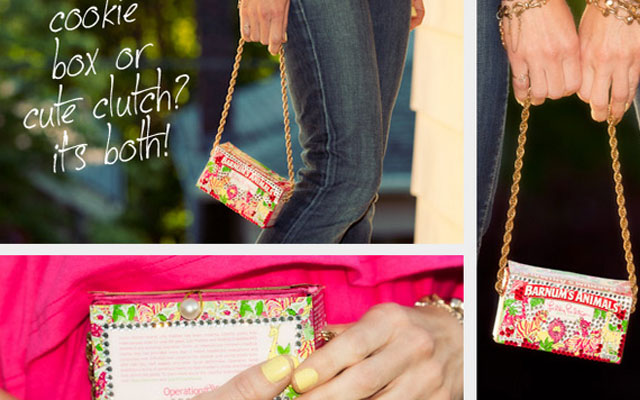
An interesting idea of making a bag from a cardboard tea box. It would seem: how else can you use the box after the tea has run out? It turns out that it makes a very stylish and unusual clutch for small items, like cosmetics or keys.
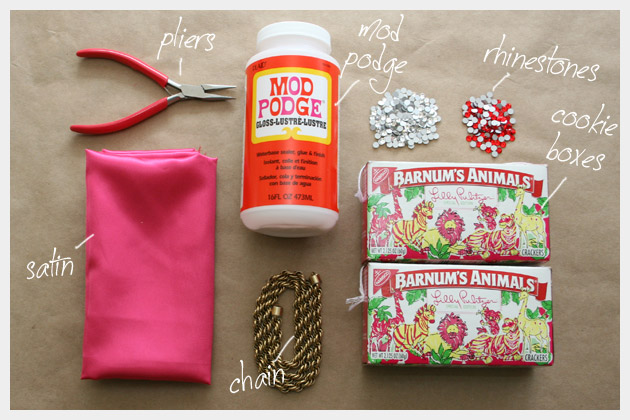
To work, you will need:
– 2 identical tea boxes or any other rectangular boxes
– A piece of satin fabric
– Glue
– Rhinestones
– 1 big bead
– Thick chain with fasteners
– Shiloh
– Scissors
Let's get to work:
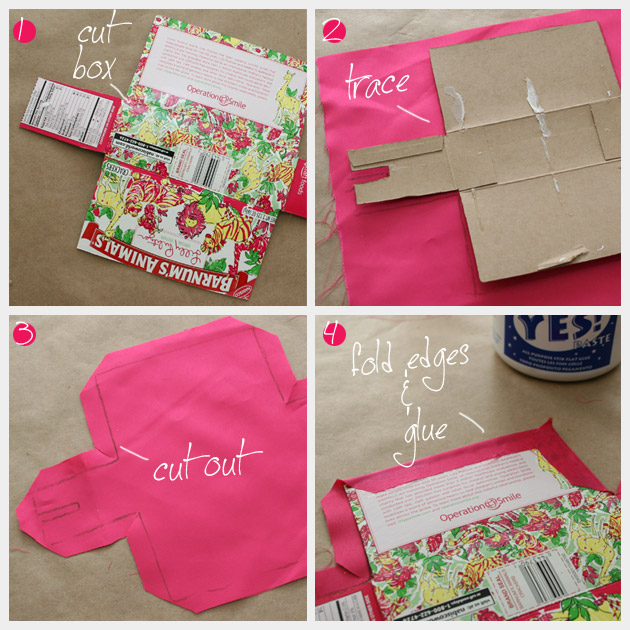
1) Take one of the boxes, open it completely and cut off the edges as shown in the photo to make a pattern consisting of five parts: three rectangles (one under the other) and two small ones rectangles on the sides. This will be the inner part of the future clutch — its lining. The edges should be cut off so that the lining fits into the main box. On the sides, a small rectangle should be cut off from the sides of the pattern to make it easier to attach the chain.
2) Attach the pattern to the fabric and cut the material along the contours, leaving about 1 centimeter on each side.
3) Cut the workpiece for future lining. Make cuts in the corners.
4) Attach the fabric to the cardboard and glue the edges with glue.
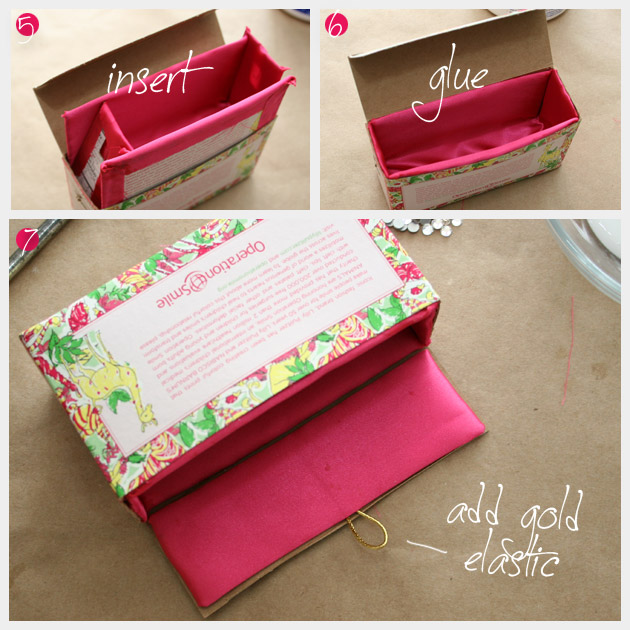
5) Insert the lining inside the whole box.
6) Place the lining on the glue.
7) Before gluing the lining, glue an elastic lace loop to the top of the box to close the clutch.
8) Use glue to decorate the box with rhinestones.
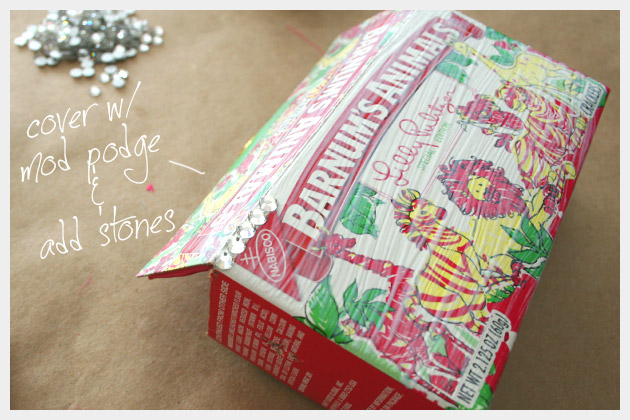
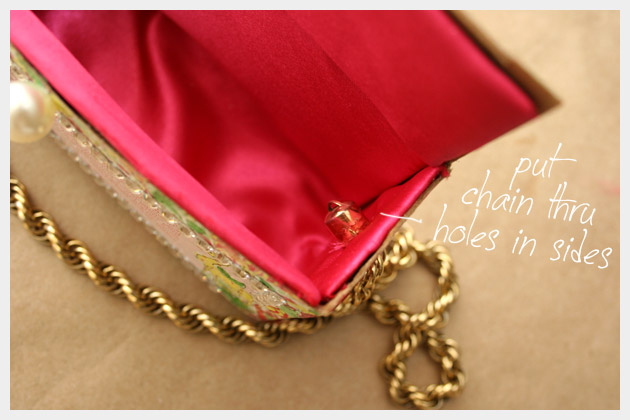
9) Attach the chain on both sides of the box, after making holes with an awl or other sharp object. It is better to choose chains with side fasteners that are specifically designed for such products.
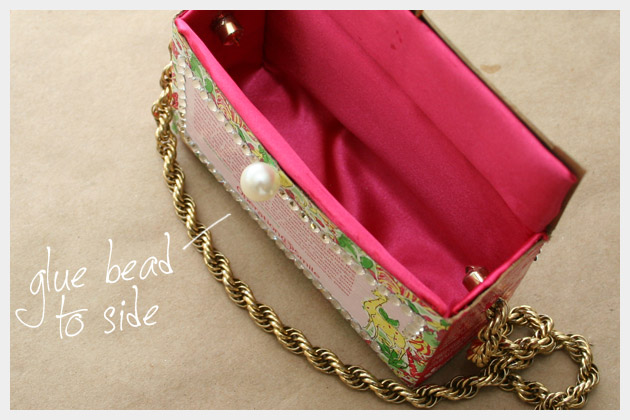
10) On the front side, sew or glue a bead that will serve as an ornament and at the same time as a clutch clasp. The clutch out of the box is ready!
Updated DIY leather bag
Each of us probably has an old leather bag in our wardrobe that we don't want to wear anymore, but it's a pity to throw it away. To solve the problem, you can renew your old bag by repainting it in new unexpected colors. Use the advice of this workshop to get your hands on a new original item.

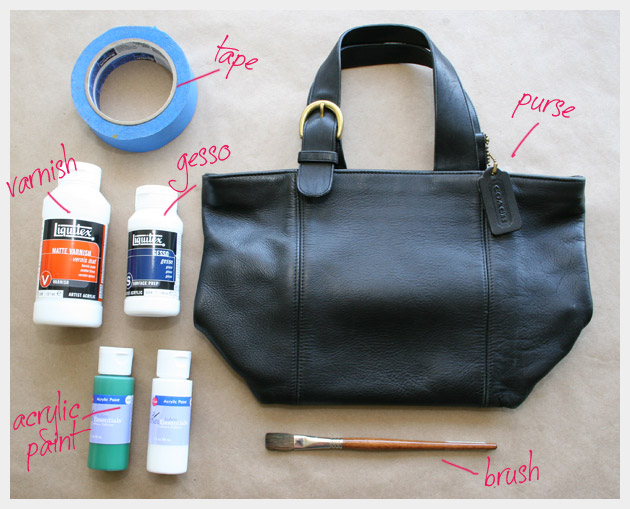
To work, you will need:
– Old leather bag
– Paper tape
– Acrylic paints
– Brush
– Ruler and handle
– Leather polish
Let's get to work:
1) Make sure the surface of your bag is clean and dry. Using a ruler, measure 2 centimeters at the top edge of the bag, making marks with a pen. You can make strips of any other width as you wish. It is necessary to measure equal segments with a ruler so that the future strips are the same and even.
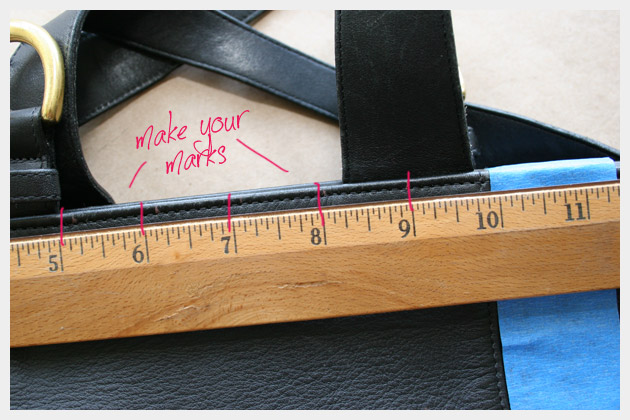
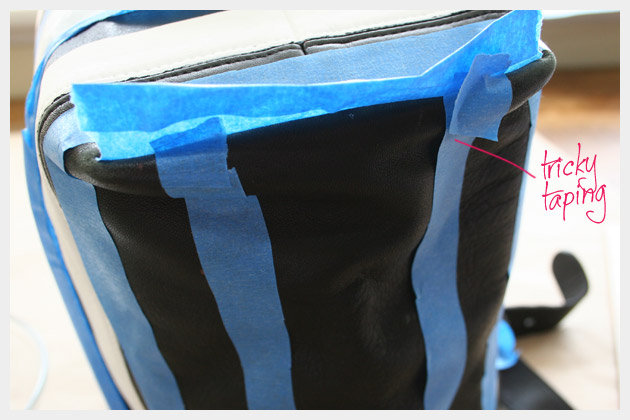
2) Stick strips of tape, focusing on the tags. On the inside, you can also glue tape so that the paint does not accidentally get to where it is not needed.
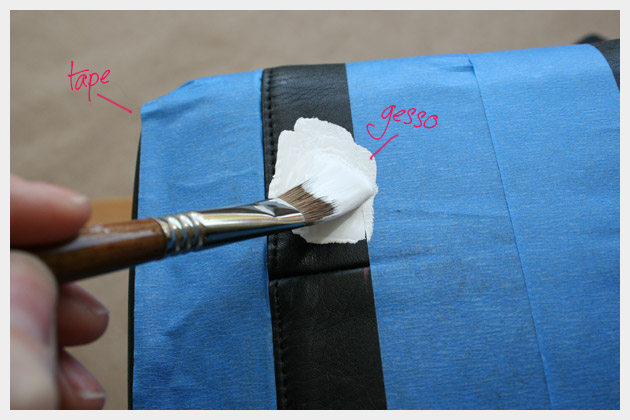
3) Leaving the strip unsealed, paint it with white paint. It is better to apply several coats of paint to make sure there are no stains. Let the paint dry well.
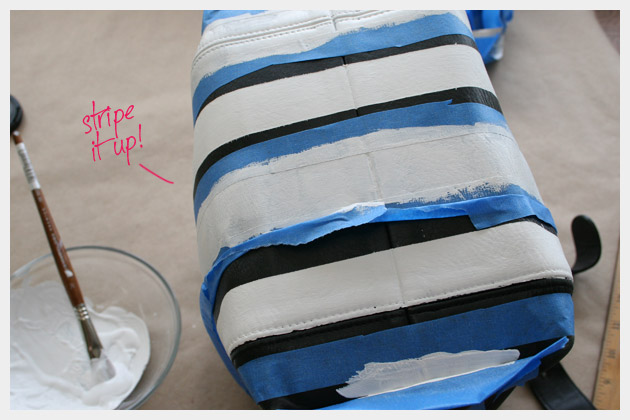
4) Make as many stripes as you can at regular intervals to make a striped pattern. You should be careful not to stick the tape in the place where the paint has not yet dried, otherwise you can ruin the strip.
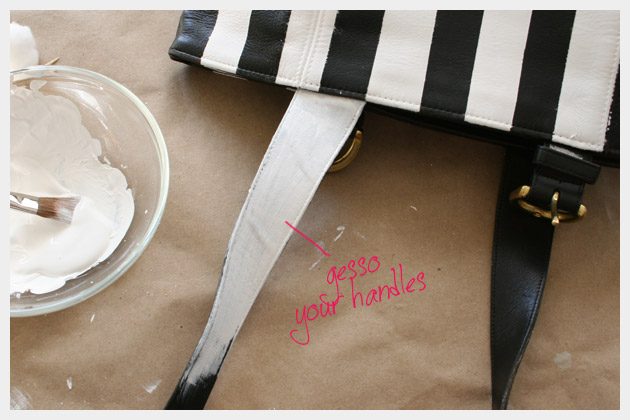
5) After all the strips have dried, paint the handles with white paint.
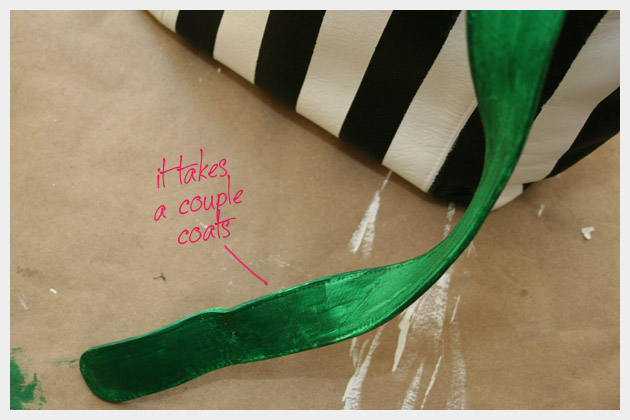
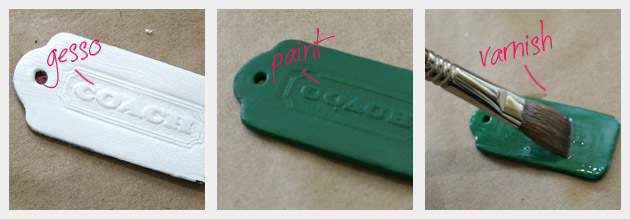
6) After drying, apply green paint on top. The white background is important so as not to lose color. It is better to make several layers so that the paint fits well and there are no stains.
7) After all layers of paint have dried, apply a special leather polish to the bag to give it a finished look.
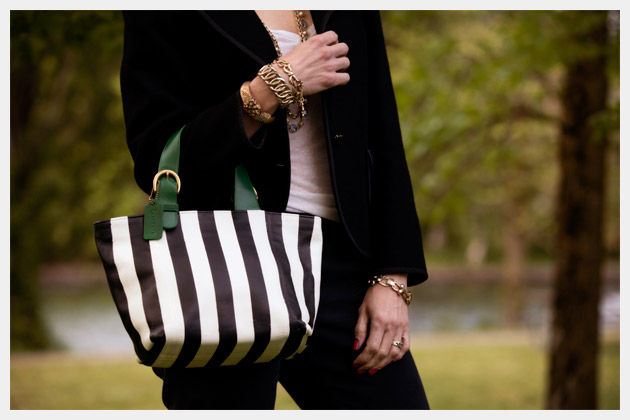
8) A beautiful new and very stylish striped leather bag is ready!
How to decorate a bag with your own hands
Decorating bags with your own hands to renew them and make them more attractive is a great idea for the summer season. One of the options for decorating a rag bag is to use a variety of felt flowers that will make any handbag bright and very noticeable.
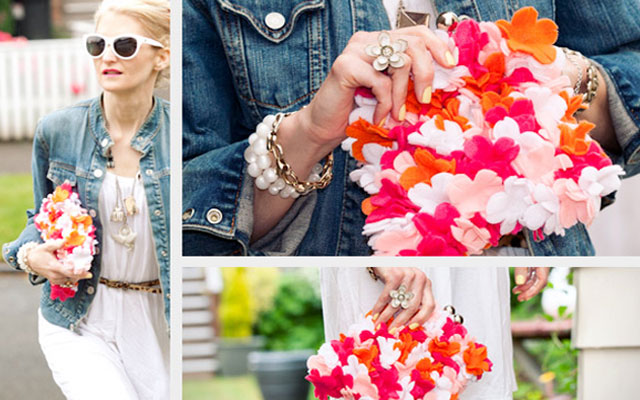
To work, you will need:
– Rag bag
– Multicolored pieces of felt
– Glue
– Paper and pencil
– Scissors
Let's get to work:
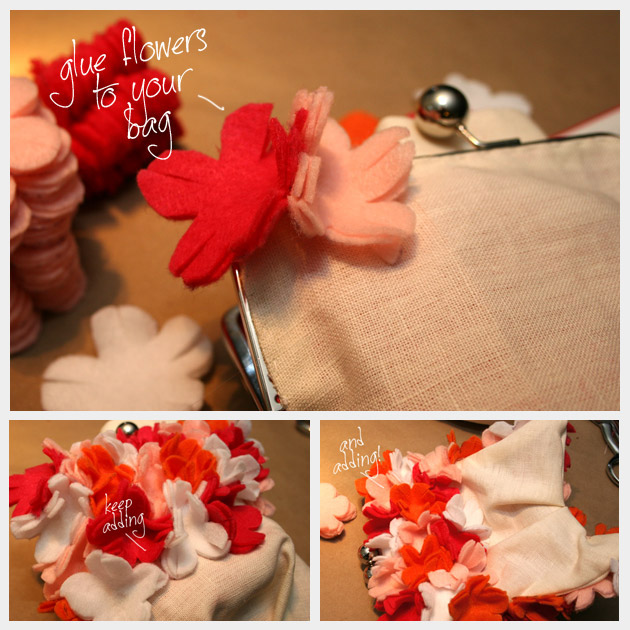
1) Draw a flower of the desired shape on a sheet of paper, depending on the size of your bag. It is better if the flowers are small – about 5 centimeters in diameter, then the decoration will look much better. Cut out the pattern, apply it to the felt and circle the flower with a pencil.
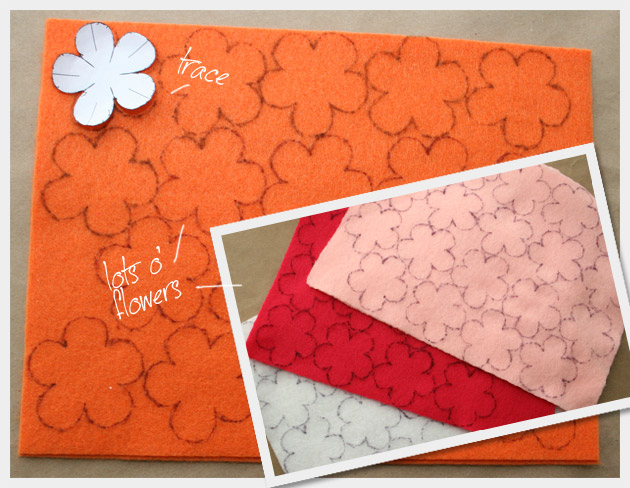
2) Cut lots of flowers out of felt leaves of different colors.
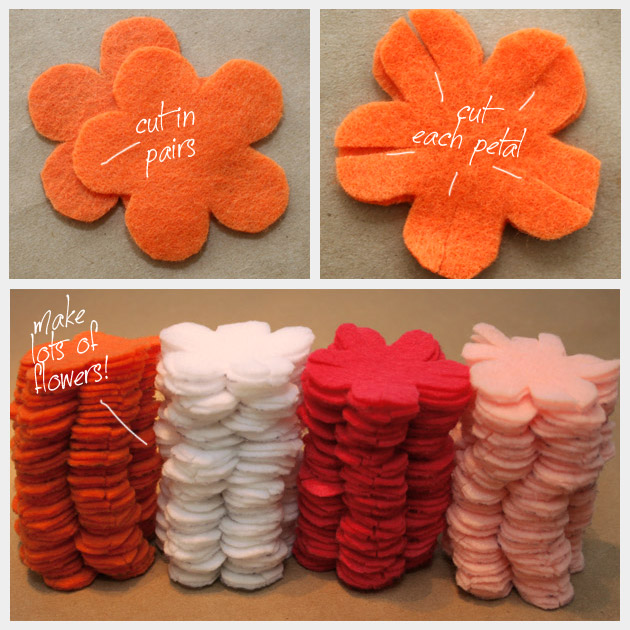
3) Put glue in the center of the flower and glue the two flowers together to make the flowers look more lush.
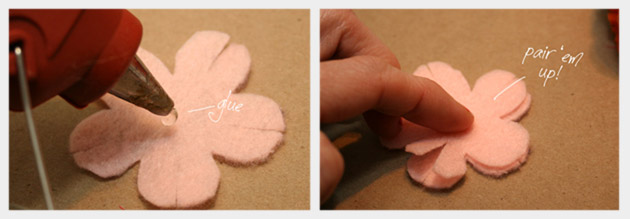
4) Start gluing pairs of flowers to the surface of the bag. You can also use a needle and thread for this purpose to sew flowers to the fabric, then they are less likely to fall off over time.
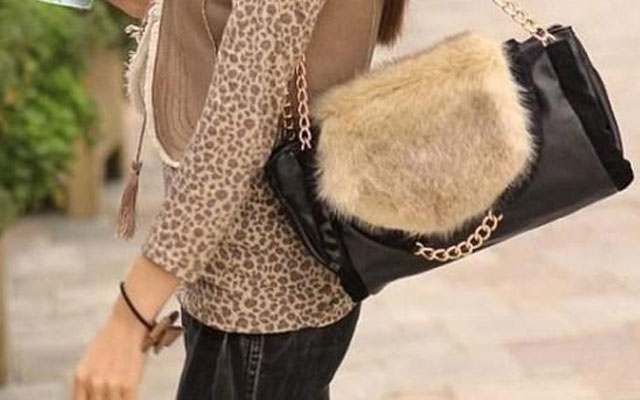
A bag decorated with a piece of fur from an old collar will look very rich and expensive. See for yourself:

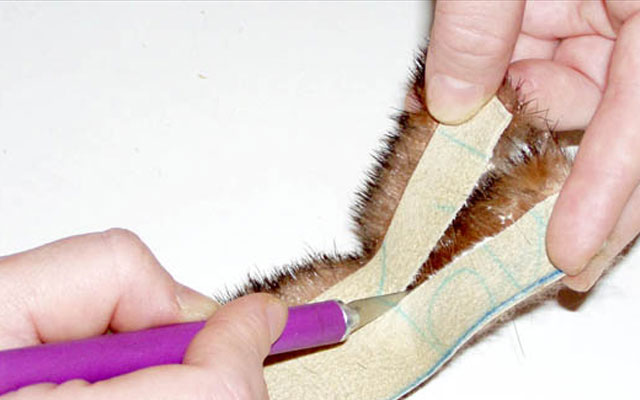
When cutting fur, you should be extremely careful and use a knife, not scissors, so as not to damage the hairs.
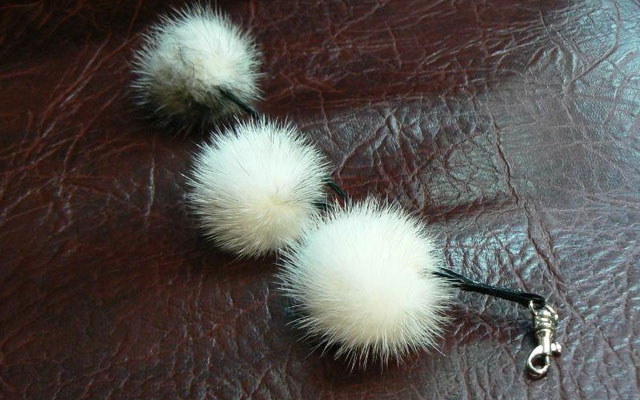
From very small pieces of fur, you can make these jewelry for a bag in the form of fluffy balls:
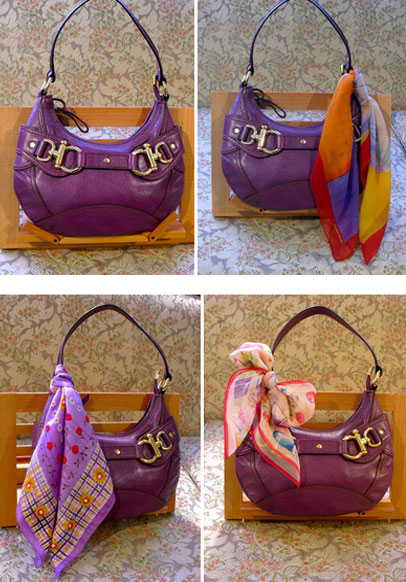
Another option for decorating a bag is to use an ordinary bright scarf, which can be tied to the handle in different ways:
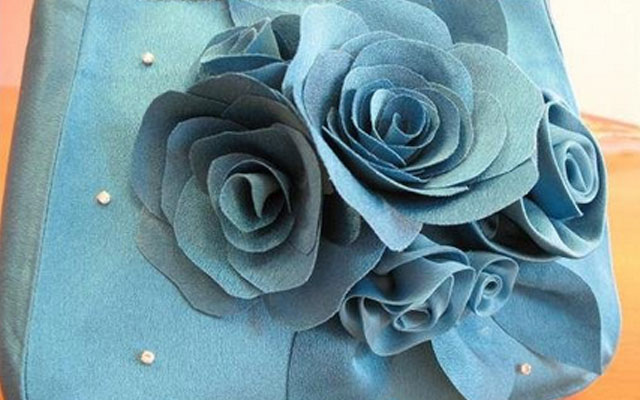
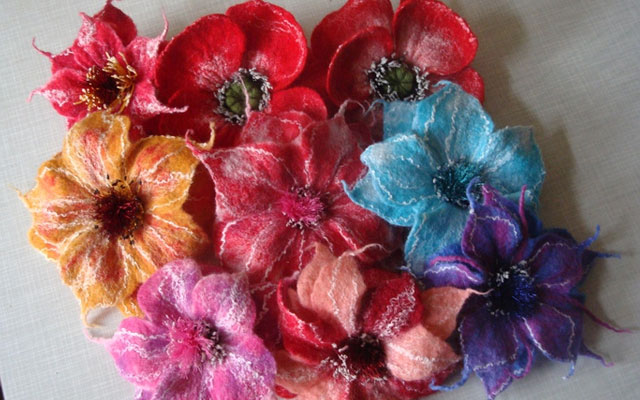
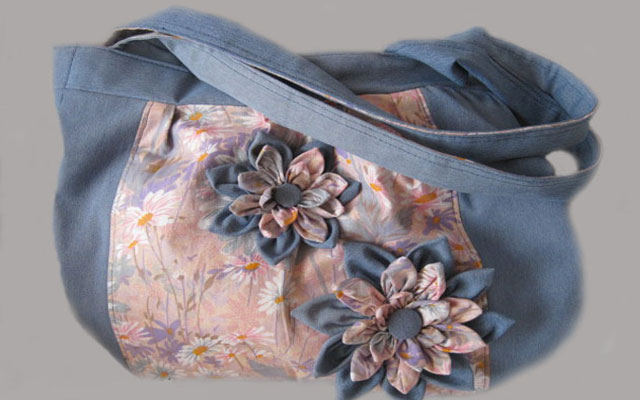
Fabric flowers look good as decorations:
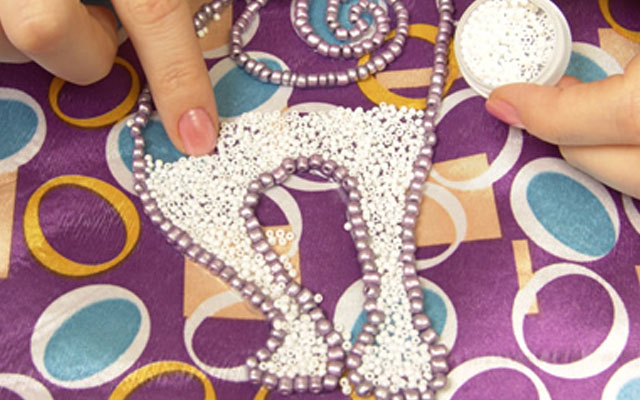
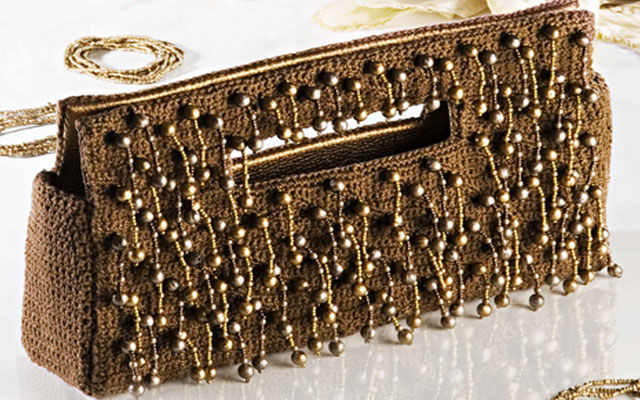
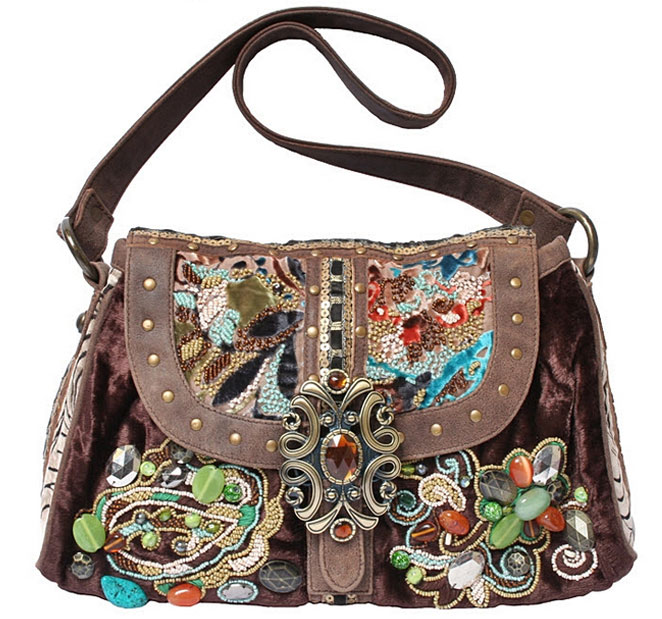
Another popular option for decorating bags is laying out beads:
Tote bag DIY string bag
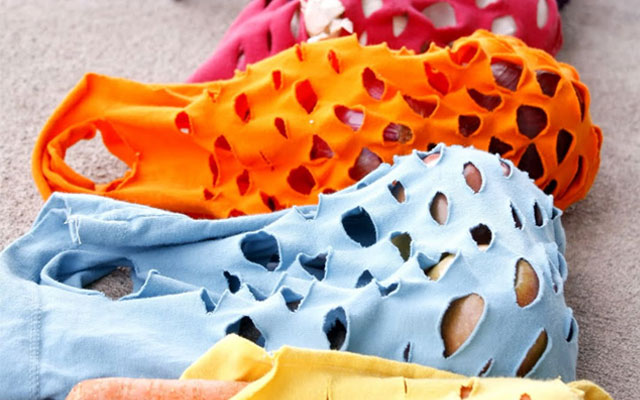
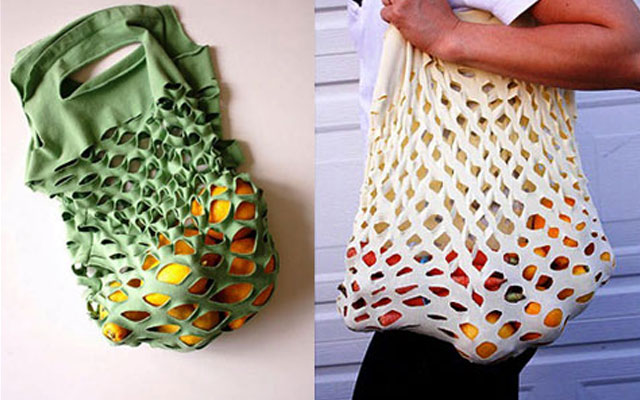
You probably remember the original Soviet-era bags in which groceries were carried. We suggest you make an unusual, but very comfortable and original bag that will look very stylish. This handbag is very easy to sew from an old shirt.
To work, you will need:
– Old stretch fabric shirt
– Threads
– Sewing machine
– Ruler and pencil
– Scissors
Let's get to work:
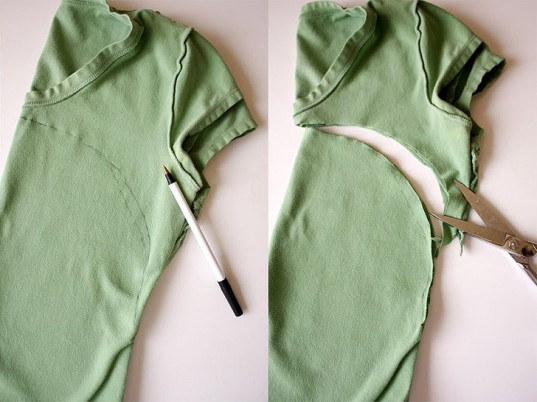
1) Cut off the upper part from an old stretchy shirt in the shape of a semicircle. To ensure that both sides are the same, fold the shirt in half, mark the cut line with a pencil, as shown in the photo.
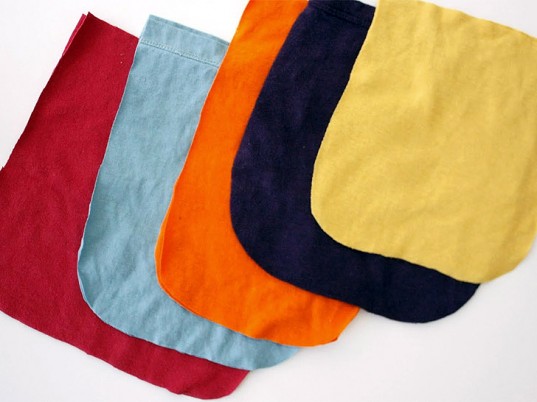
2) You can make several pieces from different T-shirts.
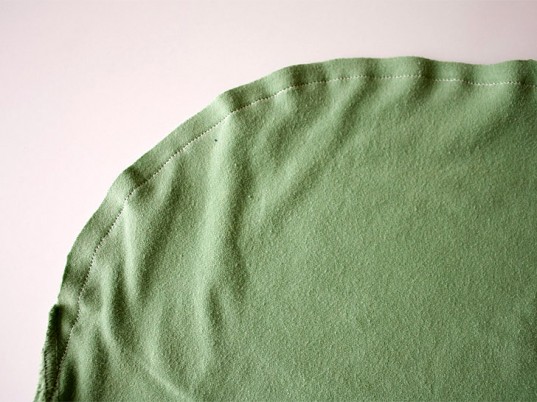
3) On the wrong side, sew the edge on the typewriter, this will be the bottom of the future string bag.
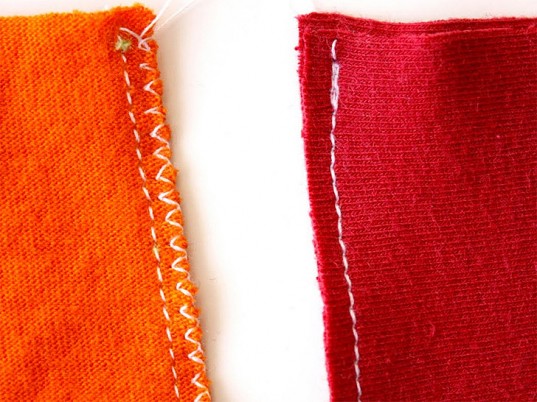
4) Treat the underside with a zigzag seam so that the fabric does not fall off during use.
5) Using a ruler and pencil, draw even rows of intermittent lines on one side, as well as a large line in the center at the top – these will be pens.
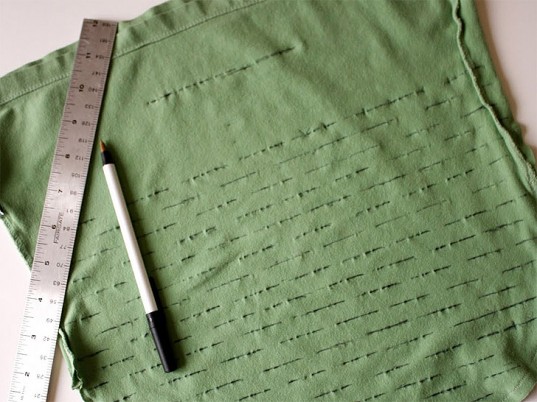
6) Using scissors, make cuts along the drawn lines, capturing the second side as well. Be careful with the edges so as not to damage the seam.
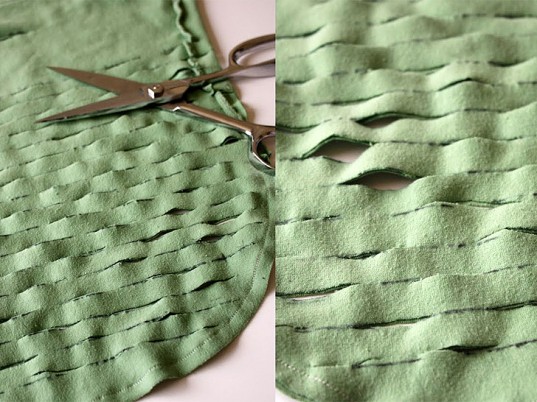
7) The original bag with slots is ready!
DIY beach bag
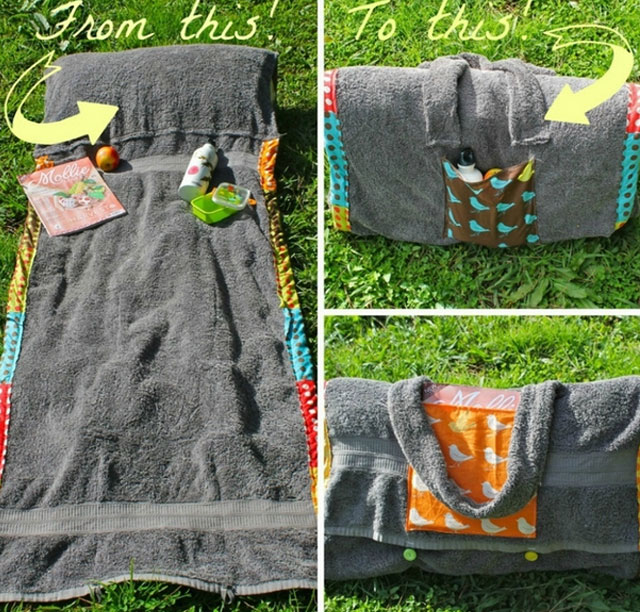
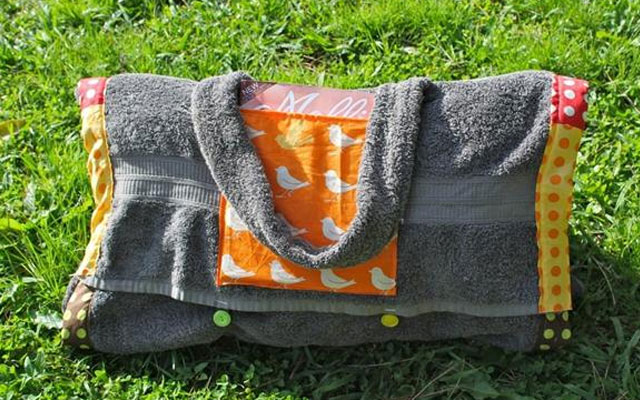
Handmade bags for going to the beach or pool are very popular. We would like to offer you a very interesting option for sewing a beach bag, which is essentially not only an accessory in which you can wear everything you need to relax, but also a bedding with a pillow. You can sew such an original beach bag from two towels.
To work, you will need:
– Two medium sized bath towels
– A small pillow the size of a towel
– Pieces of cotton cloth
– Pins
– Buttons and loops
– Threads
– Sewing machine
– Iron
– Scissors
Let's get to work:
1) Prepare a small rectangular pillow that would be slightly larger than a towel.
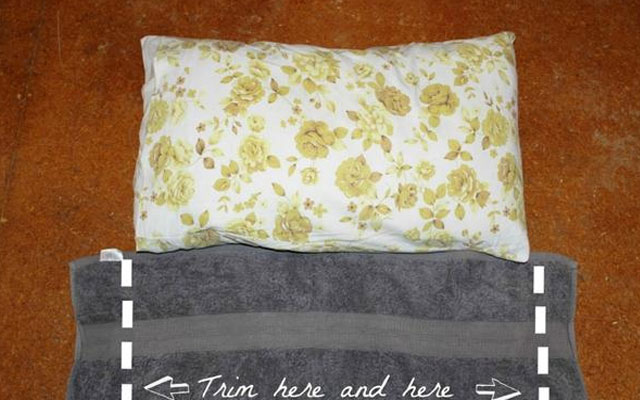
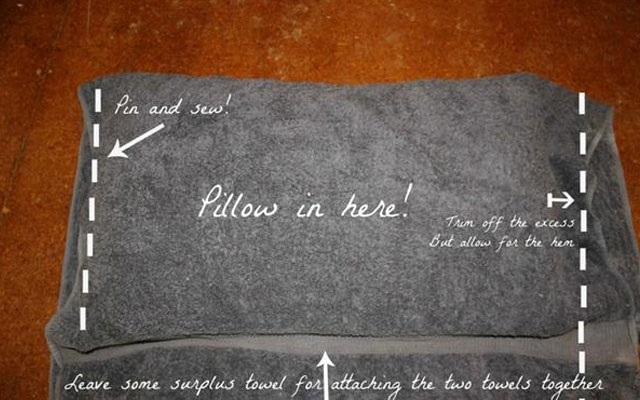
2) Place the pillow on the towel and fold it forward together with the edge to form a kind of pillow pocket. Pin the edges with pins and sew them. Leave a little margin from below to sew a second towel, cut off all the excess.
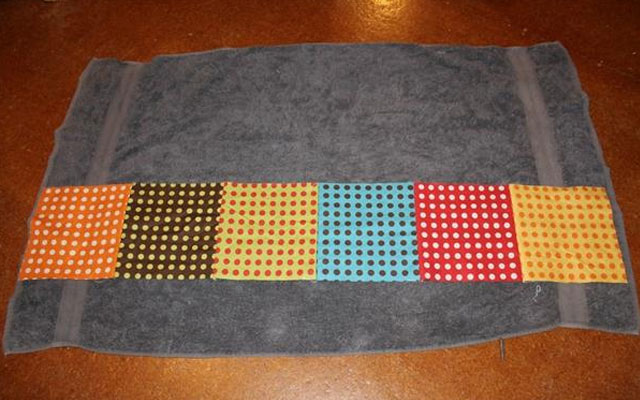
3) The second towel should be sewn on the sides with a long strip of colored cotton fabric. To do this, you need to cut a rectangle out of the fabric with a length equal to the length of the towel and about 10 centimeters wide. You can sew several pieces of material, or you can use the same fabric.
4) Fold the edges of the 1 centimeter wide strip and walk over the workpiece with an iron.
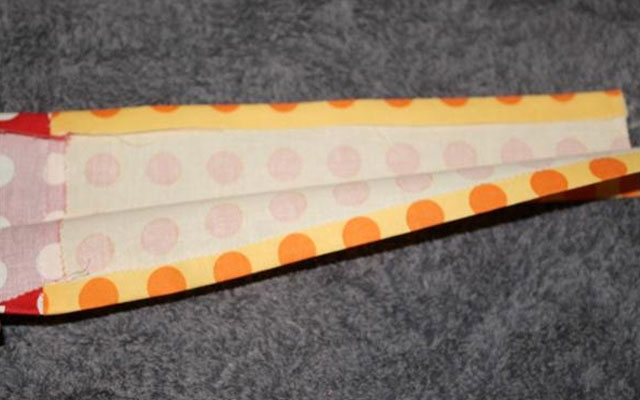
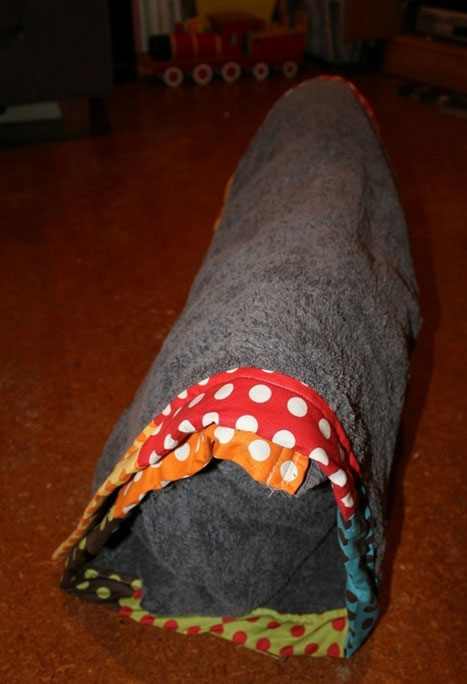
5) Sew the trim to the edge of the towel using a sewing machine. Then sew together both parts – a pillow and a towel. When folded, the product will look like this:
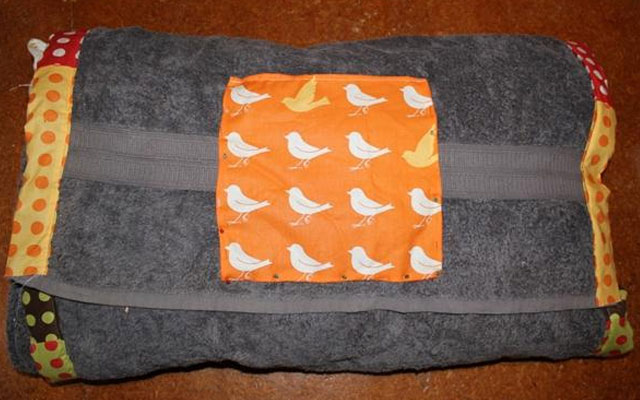
6) It remains to add important details. Prepare two square pieces of cotton fabric to make the front and back pockets. Pin the pocket with pins in the right places and then sew it on three sides, leaving one side intact. The edge of this side should be pre-treated on a typewriter so that the fabric does not fall off.
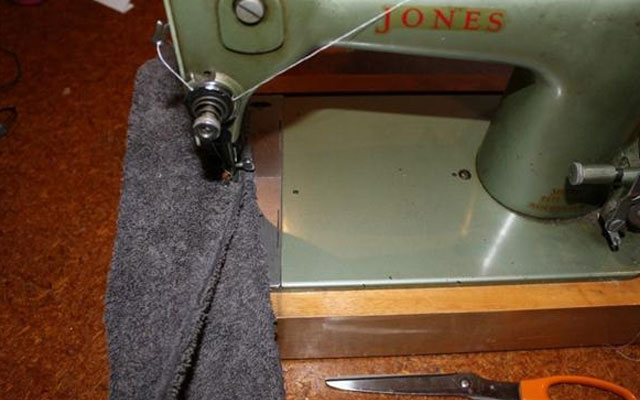
7) From the remaining piece of the first towel, sew two wide handles. To do this, cut two wide strips of the desired width, taking into account that you will fold them in half. Fold the edges and stitch the entire length with the seam.
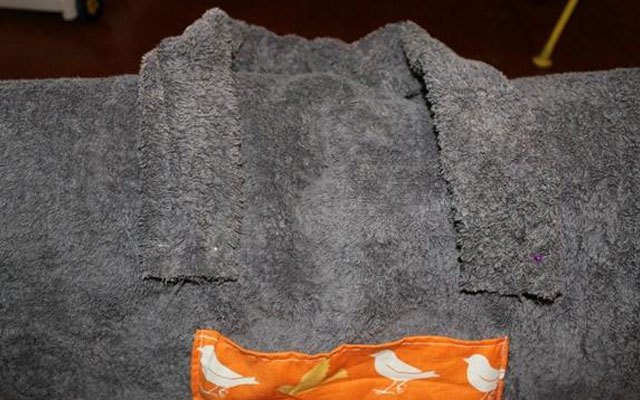
8) Pin the handles to the bag with the right pins, check if you are satisfied with their location, then unfold the product and sew the handles with a sewing machine.
9) Sew on two bright buttons where the bag will close.
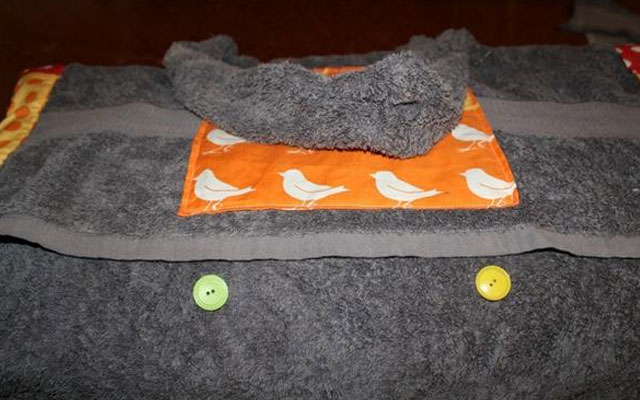
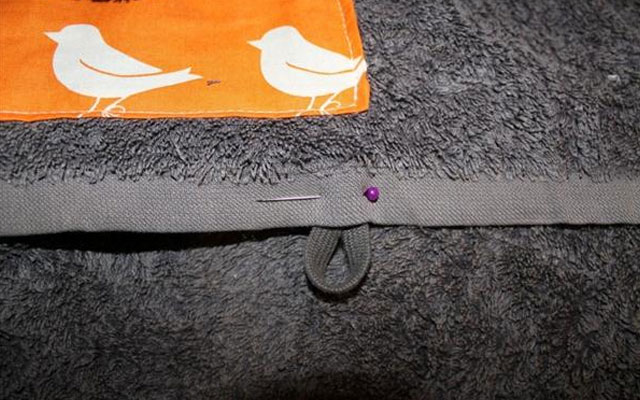
10) Sew the loops corresponding to the buttons on the lid.
11) The beach bag rug is ready!
A small handbag from a book
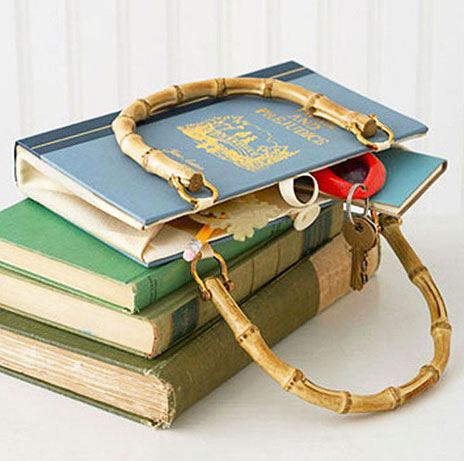
Would you like to recycle old books? There's no need to hurry! You can use their hard covers to make original little handbags with handles or DIY clutches.
To work, you will need:
– Old book
– Lining fabric
– Bamboo handles (optional)
– Glue
– Paper and pencil
– Cardboard sheet
– Paper cutter
– Scissors
Let's get to work:
1) Use a paper cutter to separate the cover from the inside of the book.
2) Open the cover a little, place the book vertically on a sheet of paper, use a pencil to draw a triangular outline of the inside of the cover and cut out the pattern as shown in the photo.
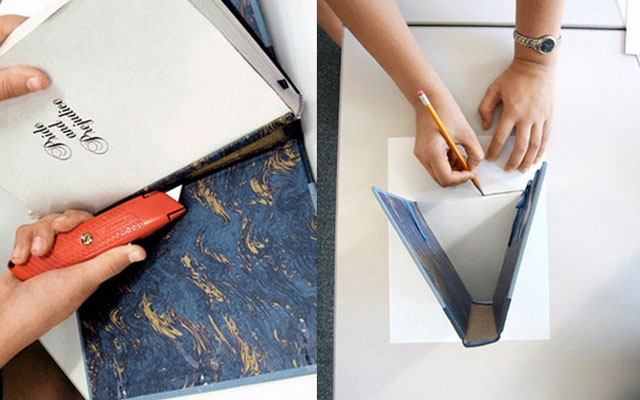
3) Attach the pattern to the fabric with pins and cut out two identical pieces, leaving 1 centimeter on the sides.
4, 5, 6) Using glue and ribbons, glue the handles, the button and the loop.
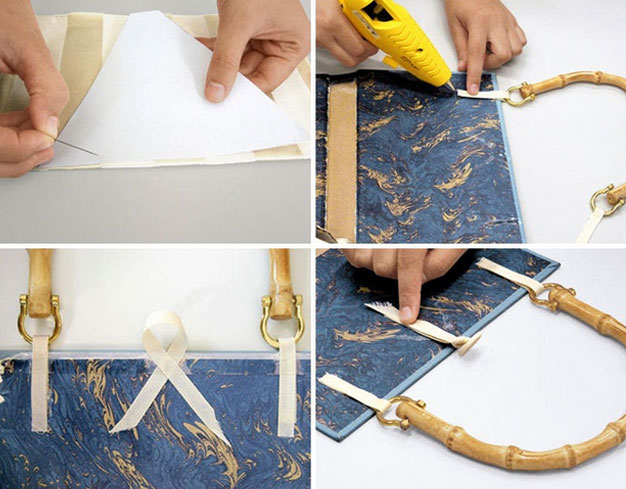
7) At the triangular workpiece, bend the edges and attach the end to the edge of the cover with glue, do the same with the other triangle on the other side. These are the side parts of the lining.
8) To keep the sides tight, glue a strip of thick cardboard to the bottom.
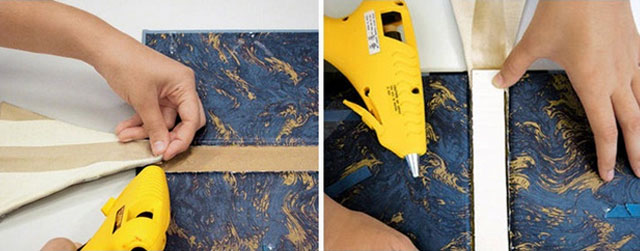
9) Glue the sides of the triangles to the edges of the book.
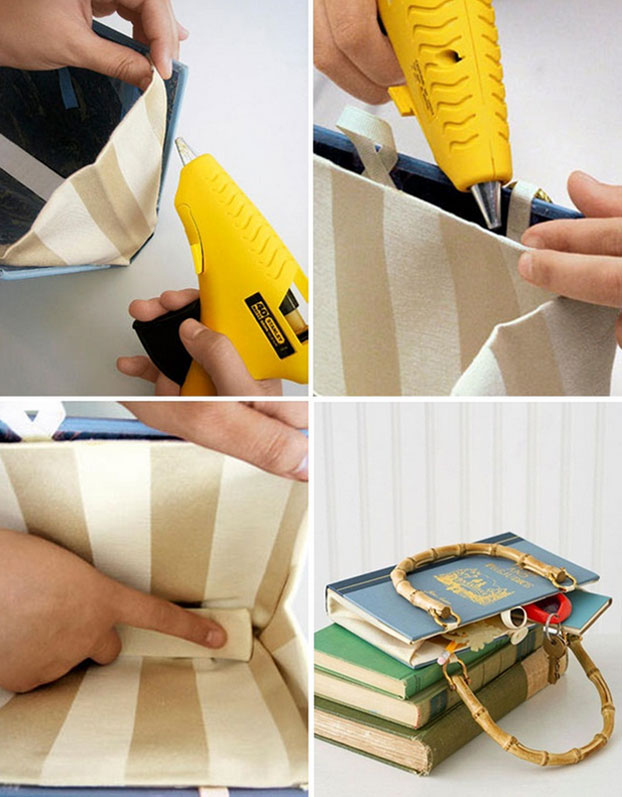
10) From the same fabric, cut out rectangular lining blanks corresponding to the sides of the cover. After bending the edges inward, glue them inside.
11) Another cardboard rectangle covered with the same fabric can be glued to the bottom.
12) An unusual book bag is ready! The outside cover can be left unchanged, which will give your new bag a special style and originality.
This video will help you make a small bag like this from a book:
DIY laptop bag
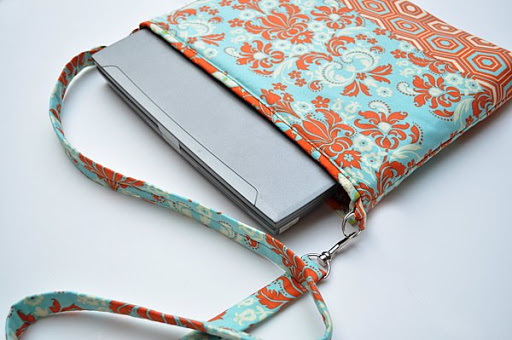
Do you think you can only carry a laptop or tablet in expensive leather or thick fabric bags? You're wrong! It's a good idea to sew a bag for equipment yourself, without having any special knowledge in the field of sewing. This bag will look stylish and unusual and will certainly attract attention.
To work, you will need:
– A large piece of fabric
– Soft lining
– Carbines and rings (2 pieces each)
– Pins
– Threads
– Sewing machine
– Scissors
Let's get to work:
1) Before you get started, measure the size of your laptop and make fabric blanks. You can use different pieces of fabric, but they should be sewn together. This will be the outside of the bag, taking into account that you will bend it in half.

2) Make exactly the same size workpieces for the lining and for interior decoration. In total, you will have 3 layers.
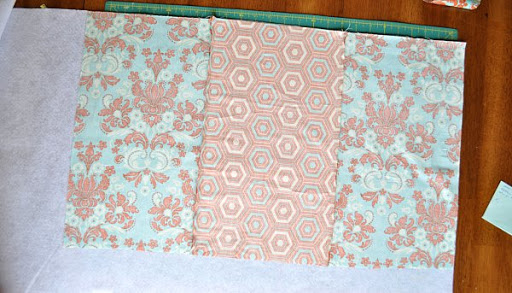
3) Fold all three layers together and sew on the sewing machine on both edges, taking into account that you will turn the bag inside out.
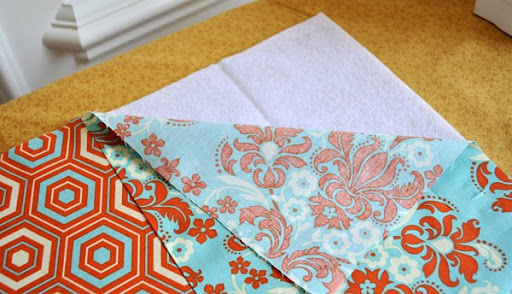
4) Sew the corners from the inside to make triangles so that when you turn the bag to the front side, the corners are not sharp.
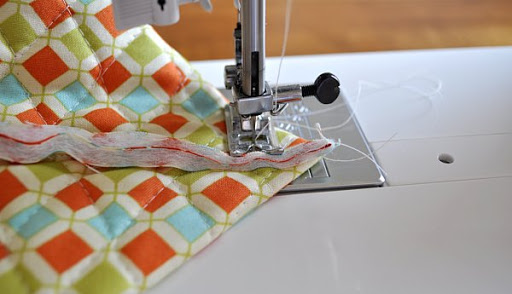
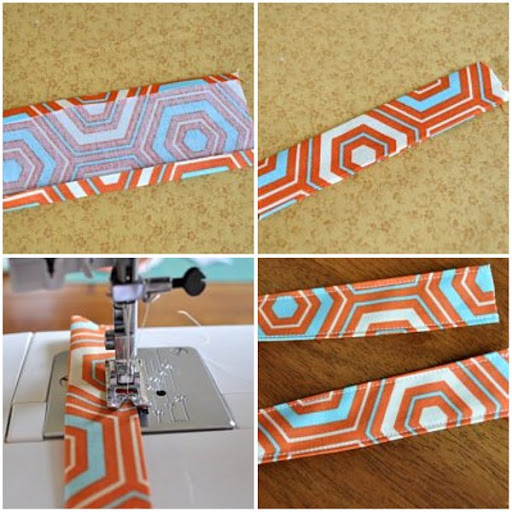
5) Use the same fabric to make long handles so you can carry the bag over your shoulder.
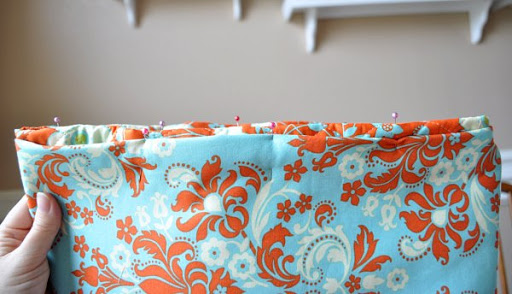
6) Pin the upper part of the bag with pins, hiding the edges inside.
7) While the upper edge is not yet stitched on the typewriter, insert the loops with metal rings to cling to the carbines. There should be one on each side.
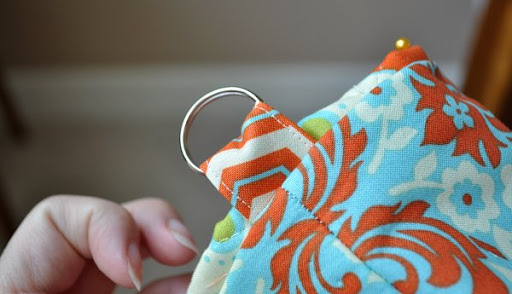
8) Sew the edge on the sewing machine.
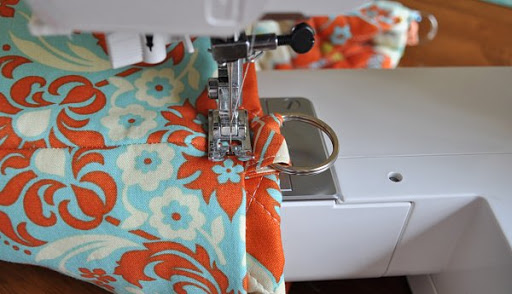
9) Attach the carabiners to both sides of the handle, sew the edge on the typewriter.
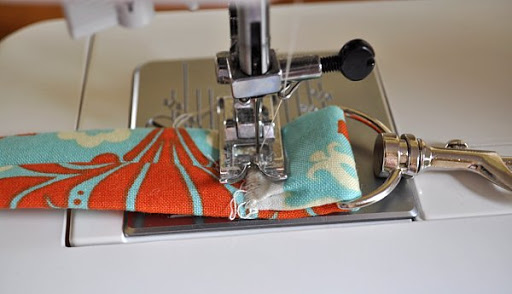
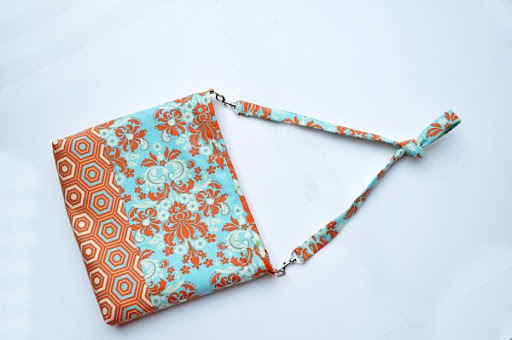
10) The original and very simple homemade laptop bag is ready!
DIY fur bag for women (video):
Cooler bag with your own hands (video): DIY
bags (photo):