
 Useful tips
Content:
DIY paper plate dog DIY dog
made of paper
New Year's craft dog made of pompons
Decorative pillow dog
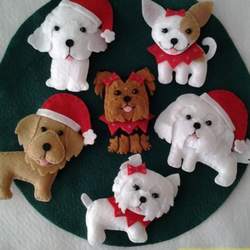
Crafts DIY felt dog
Symbol of the Year dog: DIY toy made of sock
Coffee
dogs Polymer clay dogs Phone
case
dog Dog crochet amigurumi
The New Year holidays are a time when we make wishes and give gifts to each other.
According to the Eastern calendar, the Year of the Yellow Earth Dog is coming.
To attract good luck, you can give your loved ones a handmade symbol of the next year.
Read also: How to celebrate the New Year 2018 of the DOG?
Here are some dog-shaped gift ideas made of paper, felt, pompons, polymer clay and other materials that are easy to implement at home.
DIY dog craft from improvised materials
1. Paper plate dog
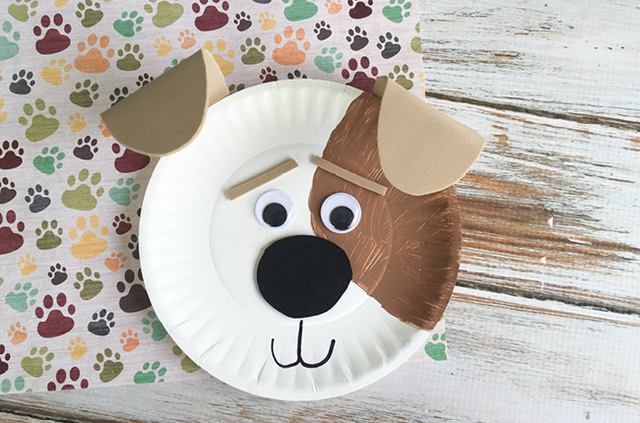
Turn a paper plate into a cute little dog with paint, peephole and glue.
You'll need:
Small paper plates
Brown acrylic paint
Foam Bumaga
Eyes Black
marker
Scissors
Glue pencil
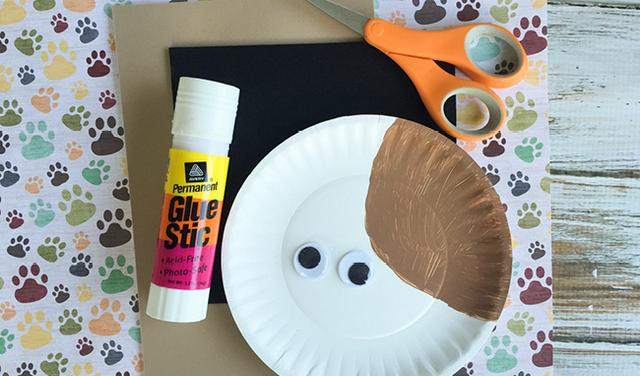
With brown paint, paint a semicircle on the plate and leave it to dry.
After drying, glue your eyes.
Cut out the nose for the dog and glue it to the plate, and draw the mouth with a marker.
Cut out the eyebrows and glue them with glue.
Finally cut the ears out of the foam bubble, fold the tips of the ears slightly and stick them to the top of the plate.
See also: How to make a beautiful SNOWFLAKE
DIY dog craft made of paper
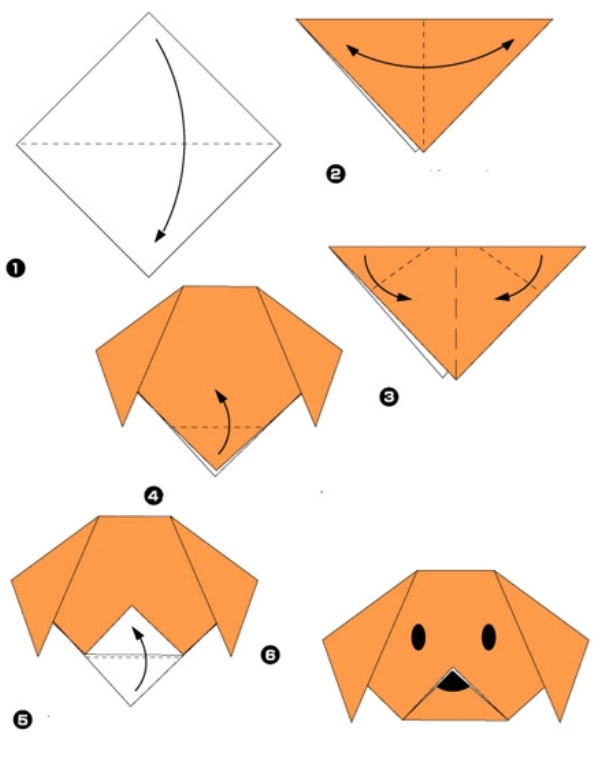
DIY Christmas dog craft
2. Pom-pom dog
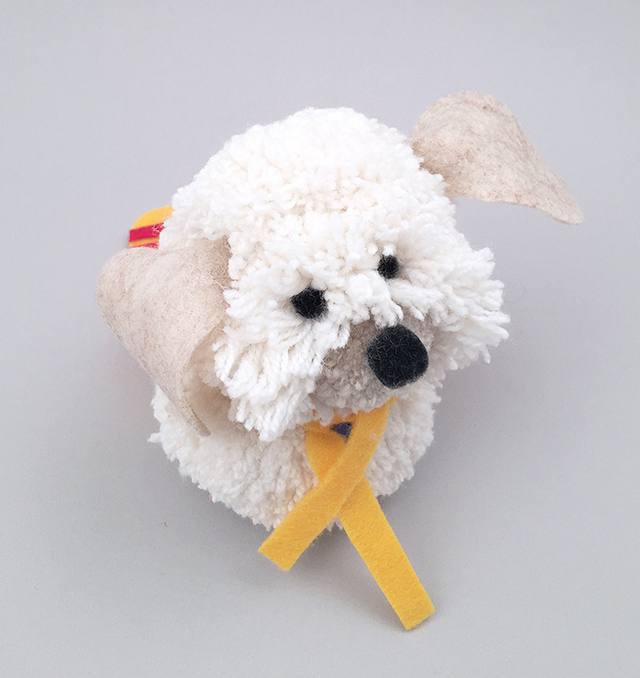
The dog symbol can be easily created from pompons that you can make with your own hands. You can read more about how to make a pompom out of threads in the article:
Read also: How to make a pompom
You can decorate such a pet to your liking.
You'll need:
Yarn
Felt
Scissors Fabric
Glue
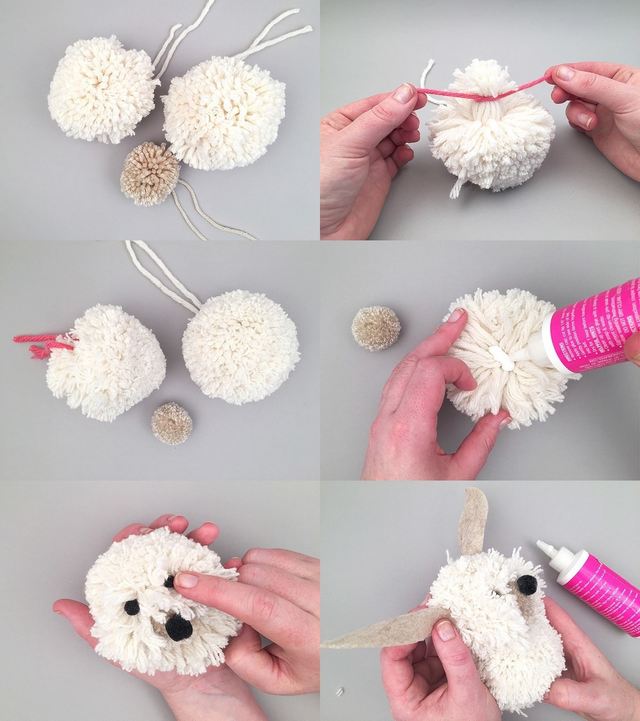
Make two large pompons for the head and body and one small pompom that will serve as the dog's face.
Take one large pompom and tie a part of the threads, which will then be the face.
Hold the pompom by the part you bandaged and cut the threads around, giving the pompom the shape of the dog's head. The remaining untrimmed bun will serve as the dog's face.
Untie the thread and spread the bundle threads by gluing a small pompom in the middle with glue. This will be a face.
Also glue the balls from ready-made small black pompons with glue to make the eyes and nose.
Tie the dog's head and body with the long remaining threads. You can also grease the joint with glue to keep both halves in place.
Cut out the ears from the felt and glue them to the head with glue.
You can continue to add a lot of details, such as a collar, or decorate the dog in any other way.
How to make a dog with your own hands: pattern
3. Decorative dog pillow
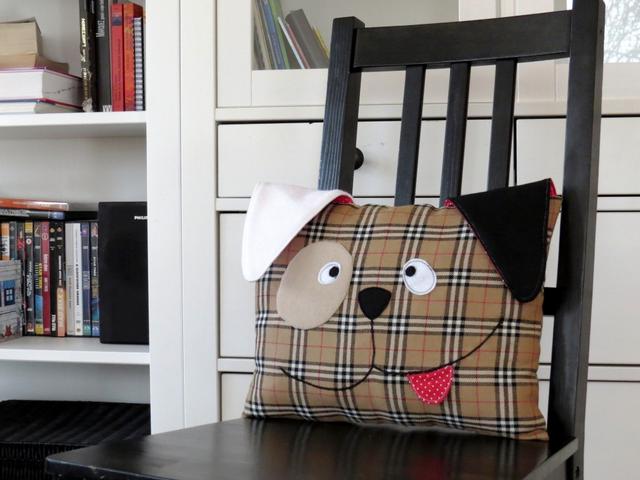
A small doggy pillow will decorate a nursery or living room and will be very comfortable when you are relaxing, sitting on the sofa, reading or fighting with pillows. You can choose the color and texture of the material to your liking, and add accessories for decoration.
You'll need:
Soft fabric of choice
Beige felt for the speck under the eye
White and black felt for the eyes and ears
Scraps of other fabric for the tongue and ears
Filler
Read also: These 6 zodiac signs will be fabulously LUCKY in 2018: what should you do to not scare off luck?
Cut out:
made of fabric, two rectangles measuring 38 cm by 30 cm for the pillow.
black felt nose
two white felt details and two black felt eye
details for the ears: 1 piece of white felt, 1 piece of black felt, 2 pieces of flap
tongue: 2 pieces made of scraps beige felt
stain
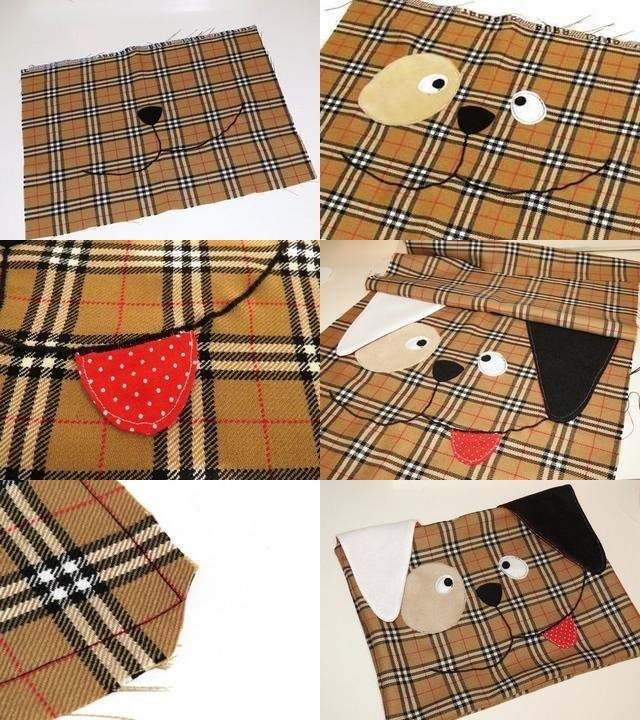
Arrange all the details of the eye: sew the spot, the white part of the eye on the spot, and the black pupil on top.
Sew the two halves of the tongue together, leaving a small hole to turn the tongue outward. Iron the tongue with an iron and sew it to your mouth.
For the ears, sew a felt piece with a piece of fabric, leaving a hole through which you can unscrew the ears. Place the lugs on the front of the pillow, place the back of the pillow on top, fasten with pins and stitch both parts of the pillow, leaving a small hole to unscrew the pillow.
Fill the pillow with filler and sew it. It's done!
DIY felt dog
4. Felt dog
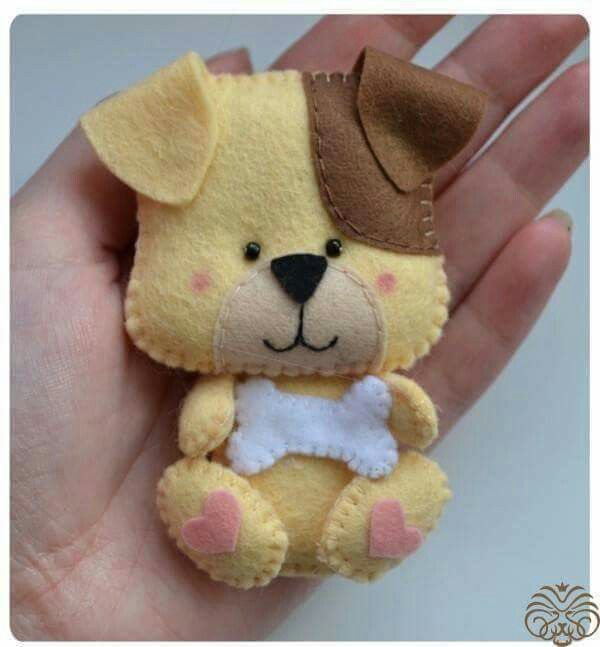
If you want to give a gift in the form of an adorable pet, try a versatile pattern to make a dog or any other felt figurine.
You'll need:
Felt of various colors (beige, brown, black, white, light pink)
Threads
Sintepon Blush
Glue gun
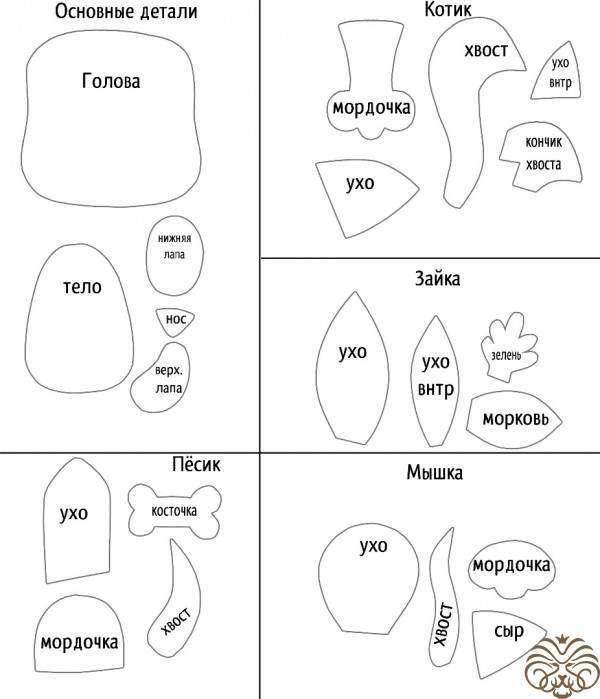
To make a dog, trace the details on the beige felt: head (2), body (2), tail (2), lower (4) and upper (4) legs, ears (4), speck, nose.
Sew the front and back parts of the body, tail and legs with a stitching seam, leaving a small hole. Fill the body, tail and legs with sintepon and sew.
Sew a speck and a bright part of the muzzle on the front of the muzzle, glue the nose. Start embroidering the dog's mouth and antennae with black threads.
Place the dog's ears on the back of the head. Sew the two parts of the head and fill it with a sintepon.
Sew on the beaded eyes and draw a blush.
Glue the details of the dog together by gluing the head to the body, followed by the legs and tail. Fold the ears and glue their edges to the dog's head.
Here are some more options for making a felt dog.
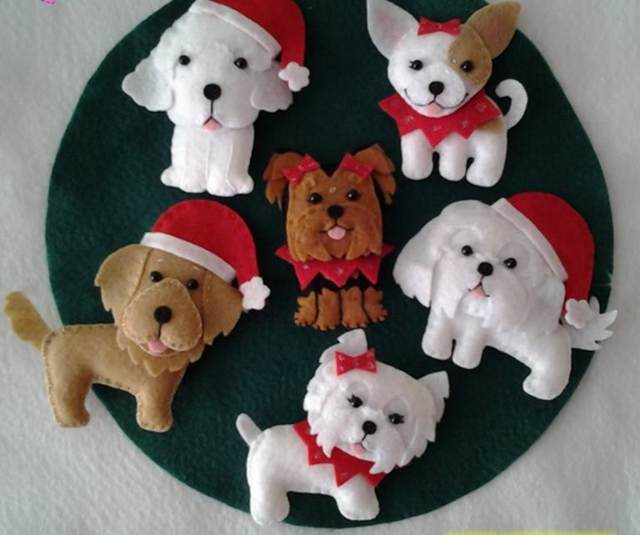
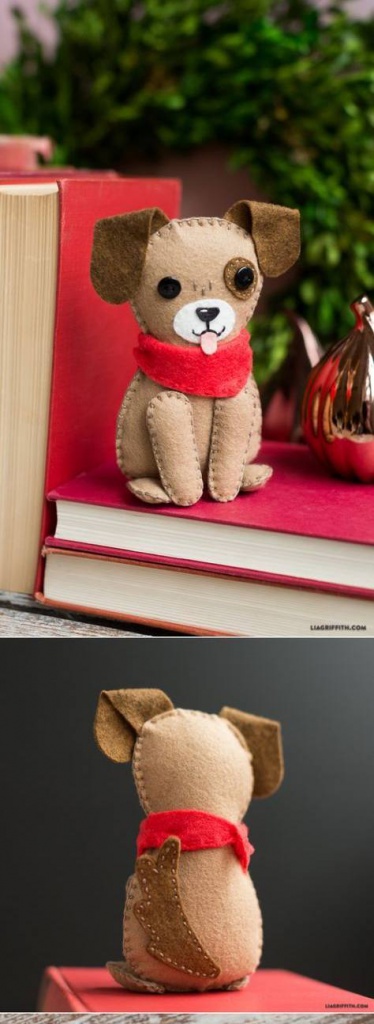
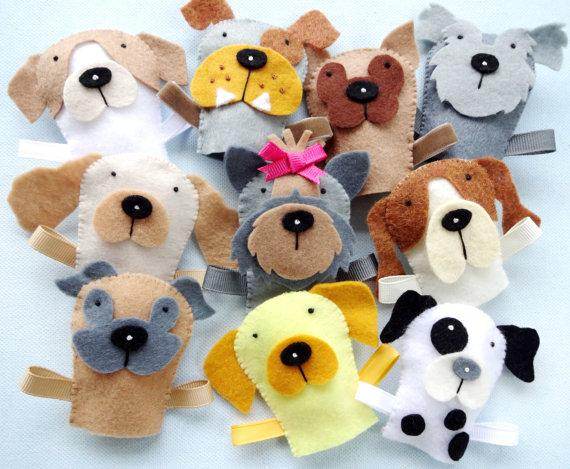
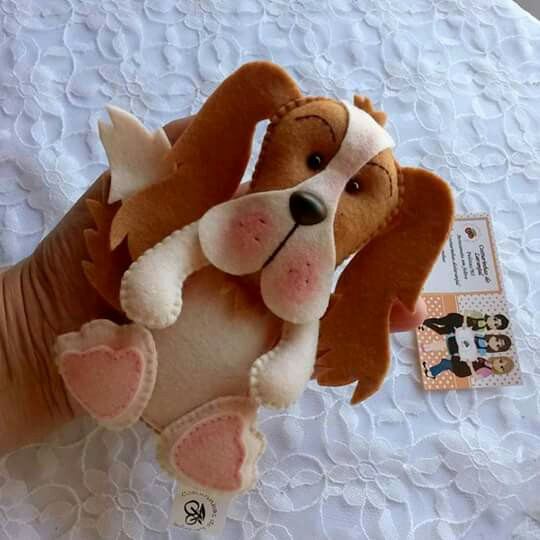
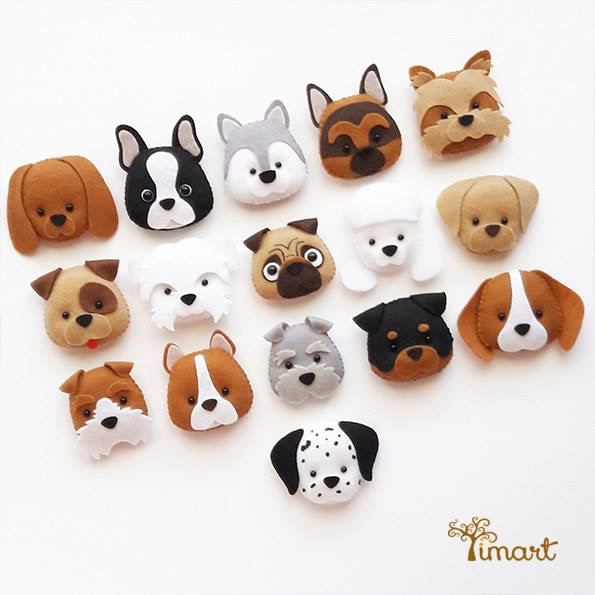
Dog symbol of the year: DIY toy
5. Sock dog
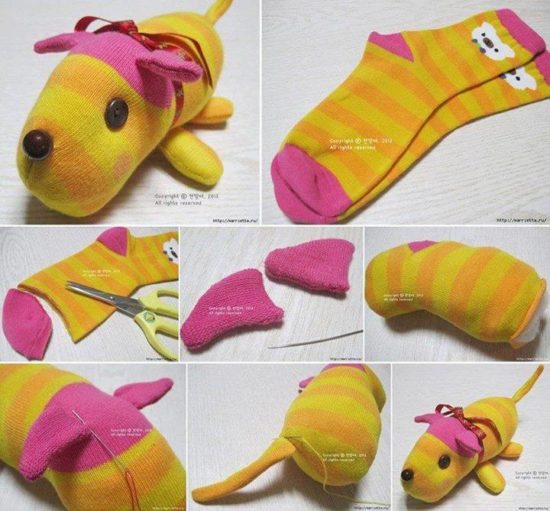
Choose the color and pattern of the sock yourself to make the dog of the right breed. To make your dog more festive, add an elegant sweater and collar.
You'll need:
A pair of socks
A thread and a needle A
button or a pompom for the nose
2 small buttons for the eyes
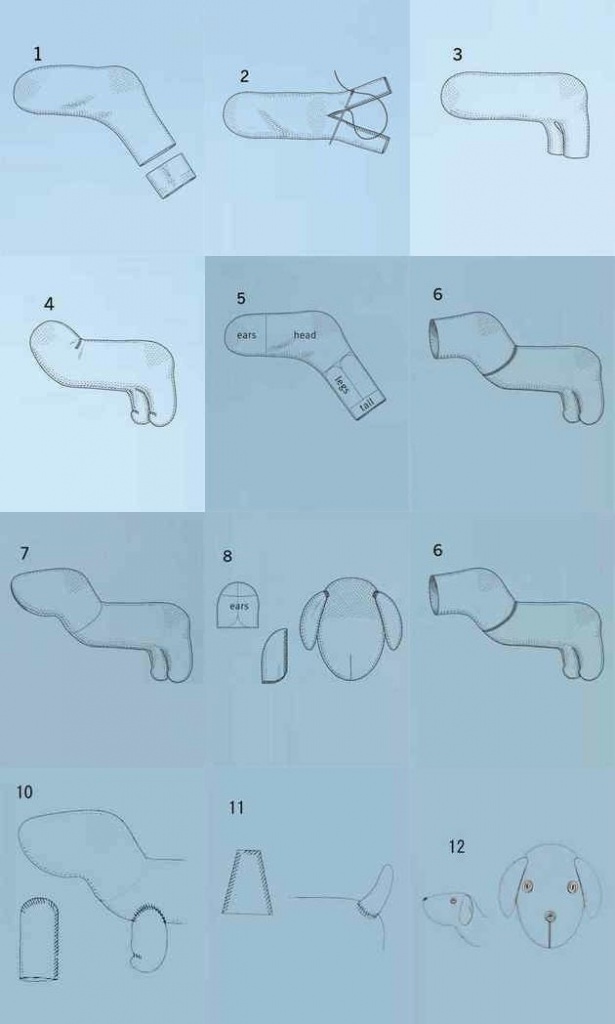
Turn the sock inside out and cut off the part of the sock with the elastic band. The ankle part of the toe will be the hind legs, and the toe will be the neck.
Make an incision in the middle of the sock from the ankle to the beginning of the heel. Sew both halves to make the hind legs, leaving a hole to fill with a padding padding.
Remove the sock and fill it with filler.
Cut off parts of the ears, head and front legs from the second sock.
Thread the part of the head around your neck and sew it, and then fill your head with a padding padding. Sew the hole to form the dog's face.
Cut out two parts of the ears from the sock and sew them together, leaving a hole at the bottom. Turn your ears out and sew them to your head.
Sew the details of the front legs, twist them, fill them with sintepon, sew them and sew them to the body.
You can bend your legs and secure them with a seam.
Make a tail in the same way.
Sew on small buttons for the eyes and a large button or pompom for the nose.
DIY symbol of the year 2018: master class
6. Coffee dogs
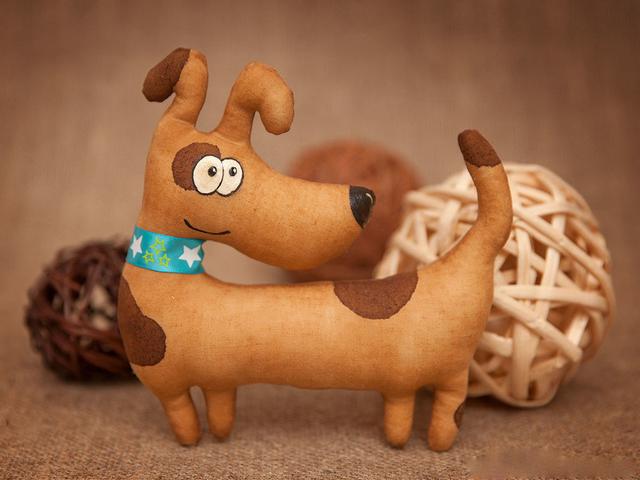
This coffee
dog will be a nice souvenir for parents, friends or acquaintances.
You'll need:
White calico 50x50cm in size
Sintepon PVA
glue
Acrylic paints in white, black and brown
Instant coffee
Needle and thread
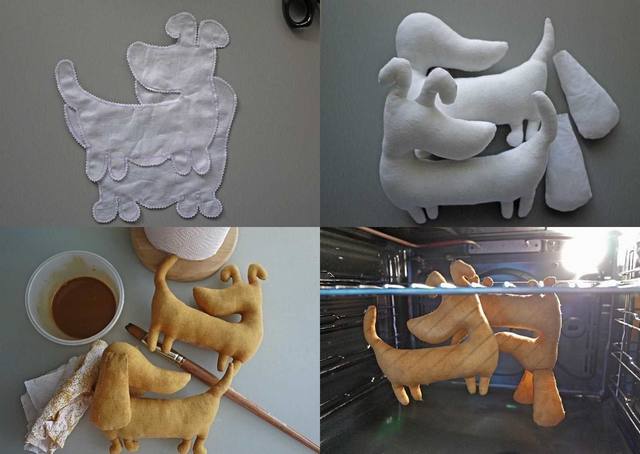
Cut the dog's parts out of the fabric, sew them together, leaving a hole to unscrew them later. Make cuts in the corners and coat them with PVA glue so that the fabric does not crumble.
Remove the details of the dog and fill it with polyester, sew the remaining holes.
Dissolve 1 tablespoon of coffee in 3 tablespoons of boiling water. Let the coffee cool down a little and add 1 tablespoon of PVA and some vanillin to the mixture.
Color the dogs and, after coloring, lightly pat dry with a paper towel. Dry the dog naturally or in the oven for about 10 minutes at 75 degrees.
Add ½ teaspoon of acrylic paint to the coffee solution and paint specks on the dog and leave it to dry again.
Draw the dog's eyes, nose and mouth and leave it to dry completely.
Read also: What to give a WOMAN for the New Year 2018 of the Yellow Earth Dog
DIY New Year dogs for 2018
7. Polymer clay dogs
1.
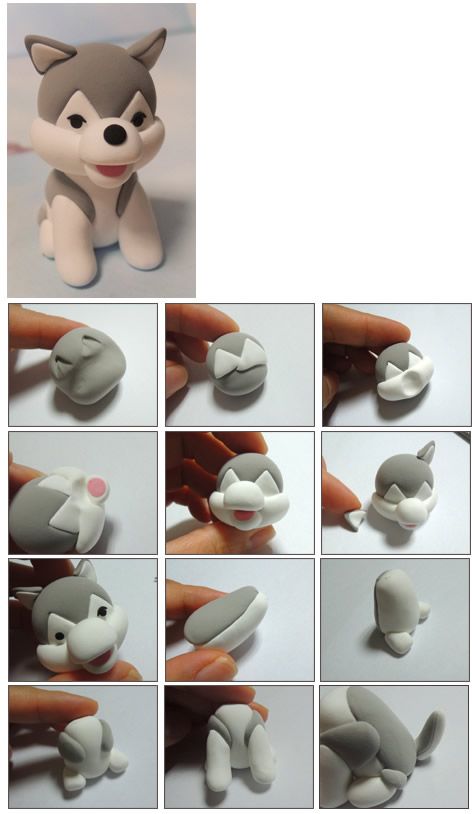
2.
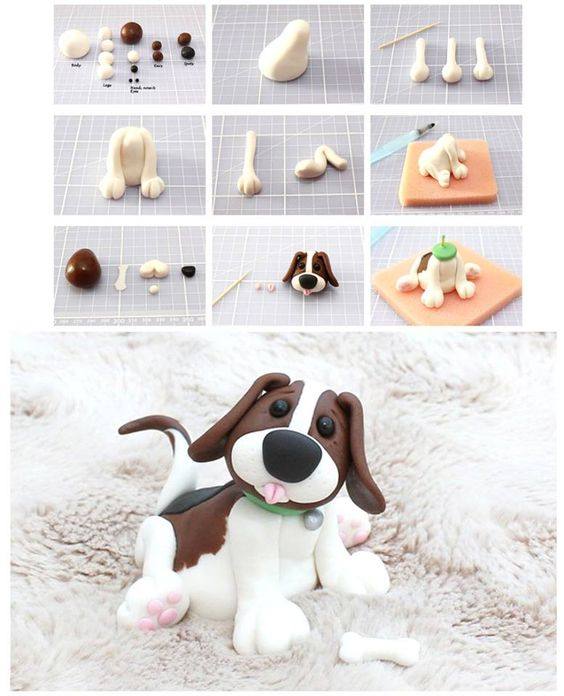
3.
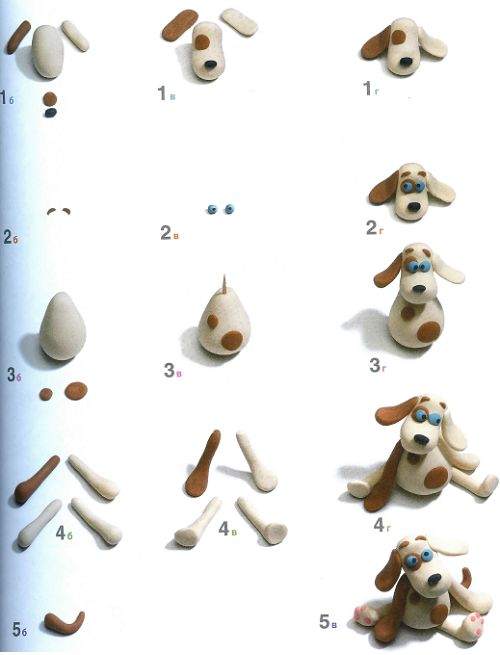
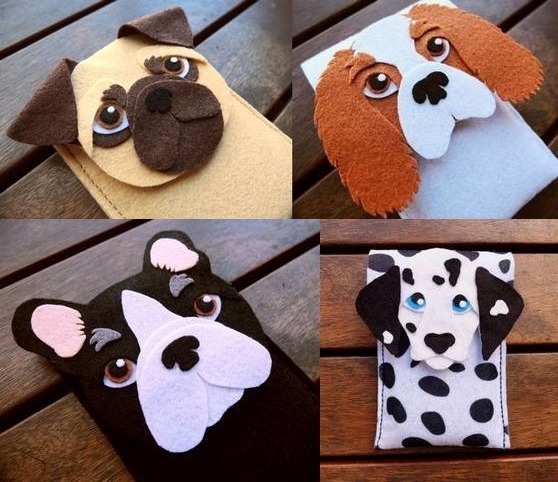
8. Dog phone case
Symbol of 2018: DIY crochet dog
9. Amigurumi dog
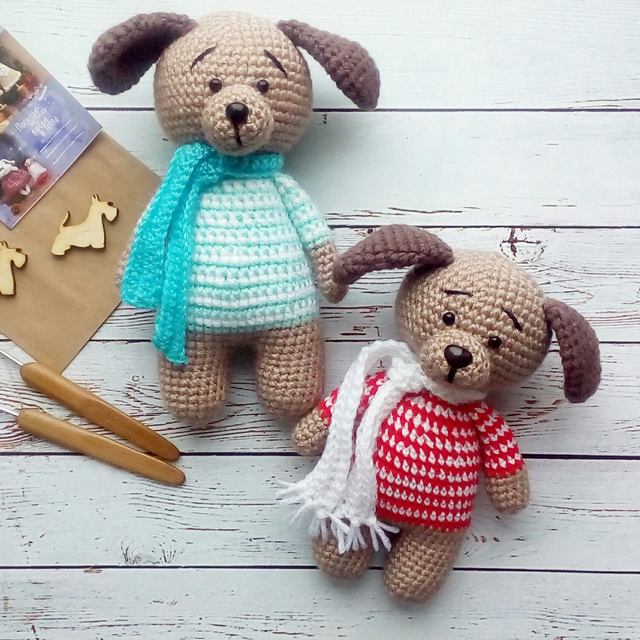
If you know how to crochet, then a dog knitted in the amigurumi style will be a great gift. Its author is
Daria Baysh.
The size of the finished toy is 16 cm.
Yarn: Yarn Art Jeans or Alize Cotton Gold
Hook: No. 2
Symbols:
V.P. – air loop
SOED.ST. – connecting column
ART. B/N – column WITHOUT crochet
UB. — reduce
APPROX. -add
The head.
1st row: 2 V.P., 6 ST. B/N into the second loop (6)
2nd row: 6 PRIB (12)
3rd row: (1 ST. B/N, APPROX.) *6 (18)
4th row: (2 ST. B/N, APPROX.) *6 (24)
5th row: (3 ST. B/N, APPROX.) *6 (30)
6th row: (4 ST. B/N, APPROX.) *6 (36)
7th row: (5 ST. B/N, APPROX.) *6 (42)
8th row: (6 ST. B/N, APPROX.) *6 (48)
9th row: (7 ST. B/N, APPROX.) *6 (54)
10-15 rows (6 rows): 54 ST. B/N (54)
16th row: (7 ST. B/N, UB.) *6 (48)
17th row: (6 ST. B/N, UB.) *6 (42)
18 row: (5 ST. B/N, UB.) *6 (36)
19th row: (4 ST. B/N, UB.) *6 (30)
20th row: (3 ST. B/N, UB.) *6 (24)
21 rows: (6 ST. B/N, UB.) *3 (21), multiple CONNECTIONS
Leave a long thread for further stitching the parts
The eyes will need to be sewn between 12 and 13 rows
Legs and body
1st row: 2 VP, 6 ST. B/N into the second loop (6)
2nd row: 6 PRIB (12)
3rd row: (1 ST. B/N, APPROX.) *6 (18)
4th row: (5 ST. B/N, APPROX.) *3 (21)
5-11 rows: (7 rows) 21 ST. B/N (21) Do not cut off the thread when you finish the other leg.
Continue to knit the body starting from the second leg.
12th row: Tie 2 V.P. from the second leg and connect to the first leg, 21 ST. B/N on the first leg, 2 ST. B/N along a chain made of VP, 21 ST. B/N on the second leg, 2 ST. B/N on the back of the chain from V.P. (46)
13-14 rows (2 rows): 46 ST. B/N (46)
Start knitting a sweater (you can change colors through each row or after 2-3 rows).
15th row: (5 ST. B/N, UB.) *6, 4 TBSP. B/N (40)
16 — 17 rows (2 rows): 40 ST. B/N (40)
18 row: (4 ST. B/N, UB.) *6, 4 TBSP. B/N (34)
19-20 rows (2 rows): 34 ST. B/N (34)
21 rows: (3 ST. B/N, UB.) *6, 4 TBSP. B/N (28)
22-24 rows (3 rows): 28 ST. B/N (28)
25 row: (2 ST. B/N, UB.) *6, 4 TBSP. B/N (22)
26-28 rows (3 rows): 22 ST. B/N (22)
Handles (2 parts)
1st row: 2 VP, 6 ST. B/N into the second loop (6)
2nd row: (1 ST. B/N, APPROX.) *3 (9)
3-6 rows: 9 ST. B/N (4 rows) (9)
Fill only the bottom of the handle.
Start knitting a pullover with a different thread color (you can alternate the color every 2-3 rows)
7-15 rows (9 rows): 9 ST. B/N (9)
Fold the part in half, tie 4 ST. B/N.
Cut the thread, leaving the long end of the thread for stitching.
Ears (2 parts)
1st row: 2 V.P., 6 ST. B/N into the second loop (6)
2nd row: 6 PRIB (12)
3rd row: (1 ST. B/N, APPROX.) *6 (18)
4th row: 18 ST. B/N (18)
5th row: (2 ST. B/N, APPROX.) *6 (24)
6-8 rows (3 rows): 24 ST. B/N (24)
9th row: (2 ST. B/N, UB.) *6 (18)
10-11 rows (2 rows): 18 ST. B/N (18)
12th row: (1 ST. B/N, UB.) *6 (12 ART. B/N) (12)
Muzzle.
Tie a 4 B.P. chain
1st row: APPROX. To the second loop of the chain, 1 ST. B/N, 3 TBSP. B/N into the last loop of the chain, 1 ST. B/N on the back of the chain, 1 ST. B/N in the last loop. (8) (You tied the V.P. chain in a circle, then continue to knit in a circle as well)
2nd row: 2 PRIB., 1 ST. B/N, 3 APPROX., 1 TBSP. B/N, APPROX. (14)
3rd row: (1ST. B/N, APPROX.) *2, 1 TBSP. B/N, (1 TBSP. B/N, APPROX.) *3, 2 TBSP. B/N, APPROX. (20)
4-5 rows (2 rows): 20 ST. B/N (20)
6th row: (8 ST. B/N, UB.) *2 (18)
Cut off the thread, leaving the long end of the thread for stitching.
Ponytail
A chain of 7 V.P., 7 ST. B/N on the back of the chain.
scarf
Dial 70 bp or more
Starting from the 2nd loop, tie several rows of ST. B/N
Connect all the details of the dog.